Showing posts with label Tutorials. Show all posts

Friday, February 16, 2018

New Website, New Things Coming Your Way!


I'm so excited to have a new website, and for the new things that I have coming your way!
Please head over to https://www.quiltingit.com/ to check it out.  While you're there subscribe to be notified, when new stuff hits the store.
My new logo was created by my friend Katie.  I love it!!
Thanks...Leisha


Monday, September 18, 2017

Rope Bowl Tutorials

I started making these rope bowls earlier this year after seeing them on instagram.
I had several requests for a tutorial, so recently I posted two videos on my youtube channel.
 
This first video shows how to make the bowl...
 
 
This second video shows how to add the handles...
Please let me know if you have any questions...
 
I talk about which rope I use, thread, presser foot and all of those details in the first video.
thanks for stopping by, happy sewing!  leisha
 

Monday, September 12, 2016

Susan's "Swoon 16" quilt!

Susan made this fun "Swoon 16" quilt, pattern by Camille Roskelley
and made with Bonnie and Camille "Daysail" fabrics.
I've quilted a few other swoon quilts similar to this, but this one is a 16" block...which is my most favorite size to quilt, so the rulers I used to quilt it are a different size.
I used a 4" circle ruler for the inner star peel design.  I used a 5" circle ruler in all the house shapes, in the block.  I used the 7" circle ruler for the design I made in the background of the four corners of each block.  Lastly, I used a -12- curve ruler from Linda at The Quilted Pineapple.
 I wish I had better light for pictures...
 Fun for me to see the design as a whole.
 The design created in the center, where all the four corners meet...is my favorite!
I love how it looks with the curved lines in the sashing.
 Close up of the block and close up of the corners!!!!  Love it!

 I can see why so many people love the "swoon" quilt, especially this size!

Here is a video of me quilting the block continuous without having to stop and start new threads.  When I do ruler work or any custom work, I like to try and figure out the easiest and fastest path to quilting a block.  This video shows how I shuffle around the rulers as I quilt, which may be too much for you, the more you do it the easier it gets.  I love the look that ruler work gives a quilt.


For more video's check out my YouTube channel!
Thanks for stopping by!
Happy sewing~!
leisha 

Friday, April 15, 2016

Arc Crosshatch Block Tutorial

Hello Quilters,
The last few days I've been machine quilting a quilt made by Beth, and I wanted to share with you a quick video tutorial.  I'm using a couple of rulers to quilt out a Arc Crosshatch design in the background corners where four large quilt blocks meet.  The curve ruler is a number -20- from Linda at The Quilted Pineapple go check her out!  The circle ruler I am using is a 5".  (the business I purchased them from, went out of business.)  Quilt pattern is called Fresh by Camille Roskelley, in her Simply Retro book.  Fabrics by 3 Sisters from Moda.  Pictured below is the design I will show you how to create in the video tutorial.


Enjoy!
 
 
Happy Quilting!
~Leisha

Monday, March 28, 2016

Clamshell longarm quilting, with no computer!

 I want to start blogging some of my favorite quilts again,
that I've had the pleasure of quilting.
 
This lovely quilt was made by my sweet friend LeAnn.
She made this tumbler quilt using the Meadowbloom line from April Rosenthal. 
I have some charm packs of this line, it is such a happy colorful line!
 If you click on some of these pictures and look at the fabrics close you can
see how geometric and fun some of them are.  When I looked at it, I just knew
I wanted to do a clamshell quilt design.  I decided to use the 4" circle ruler,
because scale wise with the size of the prints and tumbler blocks...it was just a great fit!
 For years and years I would see this design quilted out with a computerized machine,
and I always wished that I could do it, because I don't have a computerized machine I couldn't...then last fall when I made my sister a quilt for her mission, I knew I wanted to give it a try. 
I had quilted a couple of backgrounds before onwall hangings, but never a full quilt. 
So, I picked my circle ruler size and went for it. 
I knew from the few wall hangings that I did that I needed to start from the bottom, and
create a base or foundation to then quilt each layer on top.  I just went for it.
Then I realized I should have found the center of the bottom of the quilt and start there, then quilt from the center to the right side.  Then quilt from the center to the left side. 
That is how I have started on each of the other clamshell quilting that I've done since then. 
Trial and error right???!   The circle rulers that I use to quilt are super basic. 
They have a line going through the center vertically and horizontally.
 I used those lines to line up the clams as I went along.
If you can believe it or not, I didn't have to mark this quilt anywhere. 
 I made a short video and posted it on Instagram last fall, if you'd like to check it out click HERE. 
I explain how I line the ruler up from one clamshell to the other.  Essentially after quilting out the first full row of clamshells, I would start on the left side of the quilt by matching the left and right side of the horizontal lines on the ruler to the tops of the left and right side of the quilted clamshells, with the vertical line on the ruler centered in the middle of the dip between the clamshells.  (This is explained in the video if that's confusing...turn up the sound, I talk too quiet.)  Then I would use the edge of the ruler and quilt from the top of the left clamshell up around the ruler and back down to the top of the right clamshell, not crossing the line.  Then I would pause to move the ruler, lining it up on the next set of clams, working all the way to the right.  I then quilt up along the outside edge of the quilt so I can continue to quilt from right to left...so on and so forth until I get to the top of the quilt.  
I would like to note because I started at the bottom then quilted and rolled the quilt
to the top...when I got to the top, the quilt top seems to be tighter than the quilt back.  You just have to loosen it a little as you go.  BUT, then it hit me when I was finishing this one, I should have pinned the quilt on upside down and started at the top...quilting of course the clamshells upside down, too.  HAHA!  So, I'm going to try this out the next time I quilt clamshells out and see how it goes.
WHY does it matter, because then I won't have to deal with quilting from the bottom to the top and have issues with the quilt top and back being taut together.  When it comes to quilting a design out, especially without a computer sometimes its trial and error until I figure out the best and most efficient way.  When I quilt this out next time I will try and make an informative video and post it on my YouTube channel.  Until then, you're welcome to give it a try on your own and see how it works. 
Either way, I still love this design!  LeAnn was thrilled!
And look at that raspberry colored Cuddle/Minky.  Love it!!!
Cuddle brand minky is available from Shannon Fabrics, sold in stores worldwide.
Thanks for stopping by!!
 
-Leisha

Wednesday, May 21, 2014

Quilt Prep Intructions

After sharing the other post about "10 things your longarm quilter wants you to know"; I thought it would be best for me to share, with those of you who I quilt for,
the quilt prep steps that help me when machine quilting your quilts.
These steps save me oodles of time, which keeps your cost of quilting down.
Please take the time to review these.  Thank you!

These quilt prep tips have been added to the Quilt Prep tab on the top right of
my blog, for your convenience and future reference.
~
Please do the following before bringing or sending your quilts to be machine quilted.
Make sure your batting and quilt backing are at least 4" bigger than your quilt top on ALL sides.


Please make sure your quilt back and quilt front are squared up (no extra fabric hanging off any end) and cut exactly straight.  Otherwise it is difficult to have the quilt lay flat and be tight on the quilting frames.

Please iron your quilt front and back well.  It helps prevent puckers and pleats while I’m quilting. 

Leave the selvage on the top and bottom of your quilt back, this helps the top and bottom edge to be straight, which is a must!


Trim all threads on your quilt, the top of the quilt and the back where all of your seams are.   


Borders have a habit of growing when they are on the machine.  To prevent that, measure your quilt and cut your borders to size.  Then pin the borders on, starting at each end, then the middle, then several places between.  This is especially important on multiple large borders.


The quilt top should be free of button, beads, etc. for best quilting results.  The quilt back should be free of ribbons, buttons, beads or wool applique. 

Bring your quilt front and back separated, nicely folded or on a hanger.  Quilt front and backs that are folded up together or brought in a sack get wrinkled easily.   

Don't pin or baste your quilt layers together.  Each layer will be pinned to the machine individually.   


When piecing Minky, make sure you have the stretches going the same way, otherwise I will not quilt it.  It is also important to cut the minky straight, especially before piecing.  Check out this video I made for more tips on Minky: https://www.youtube.com/watch?v=g2SDbAcL56g 

Sheets are not considered suitable backing for quilts, because of the high thread count. 

Quilting jeans:  I've decided that I will not be quilting jean quilts.  The thickness of the jeans is tough on our machine.  Sorry for the inconvenience.

ŸIf you need a quilt quilted by a certain date please call ahead of time and let me know.  If you desire to be added to my list, I require the quilt to be to me within 2 weeks of the deadline, or a rush fee will be charged.  I will try my best to help you, however I quilt on a first come first serve basis.  Rush fees are between $25 to $65, depending on the size, quilting design, and size of your quilt.        
To get pricing about quilting and sewing please contact me at: Quiltingit@gmail.com

"10 things your longarm quilter wants you to know"!

I was lucky enough to be asked by Sarah from Crinkle Love, to join with her, Natalia Bonner from Piece N Quilt, and Christina Lane from Sometimes Crafter to share some tips on preparing your quilt for your longarm quilter to quilt.  Please click on the link below to read all about it!  Thanks, Sarah! 


Wednesday, January 1, 2014

"Scrappy Strip Along" tutorial

Last night I finished piecing the top to a quilt I started over a year ago.  (We all have projects like that, right???)  I've had some people interested in a pattern/tutorial, here you go, hope you enjoy!  Please use the hash tag #scrappystripalong on Facebook or Instagram, if you post pictures, I would love to see what your quilt looks like.  You are welcome to share this tutorial, the more the merrier, right?!?!  However, please be respectful and share this post and not copy its contents for a post of your own.  Thank you and let the sewing begin!  Please read this entire tutorial before getting started.
These are a few of my first blocks!
 
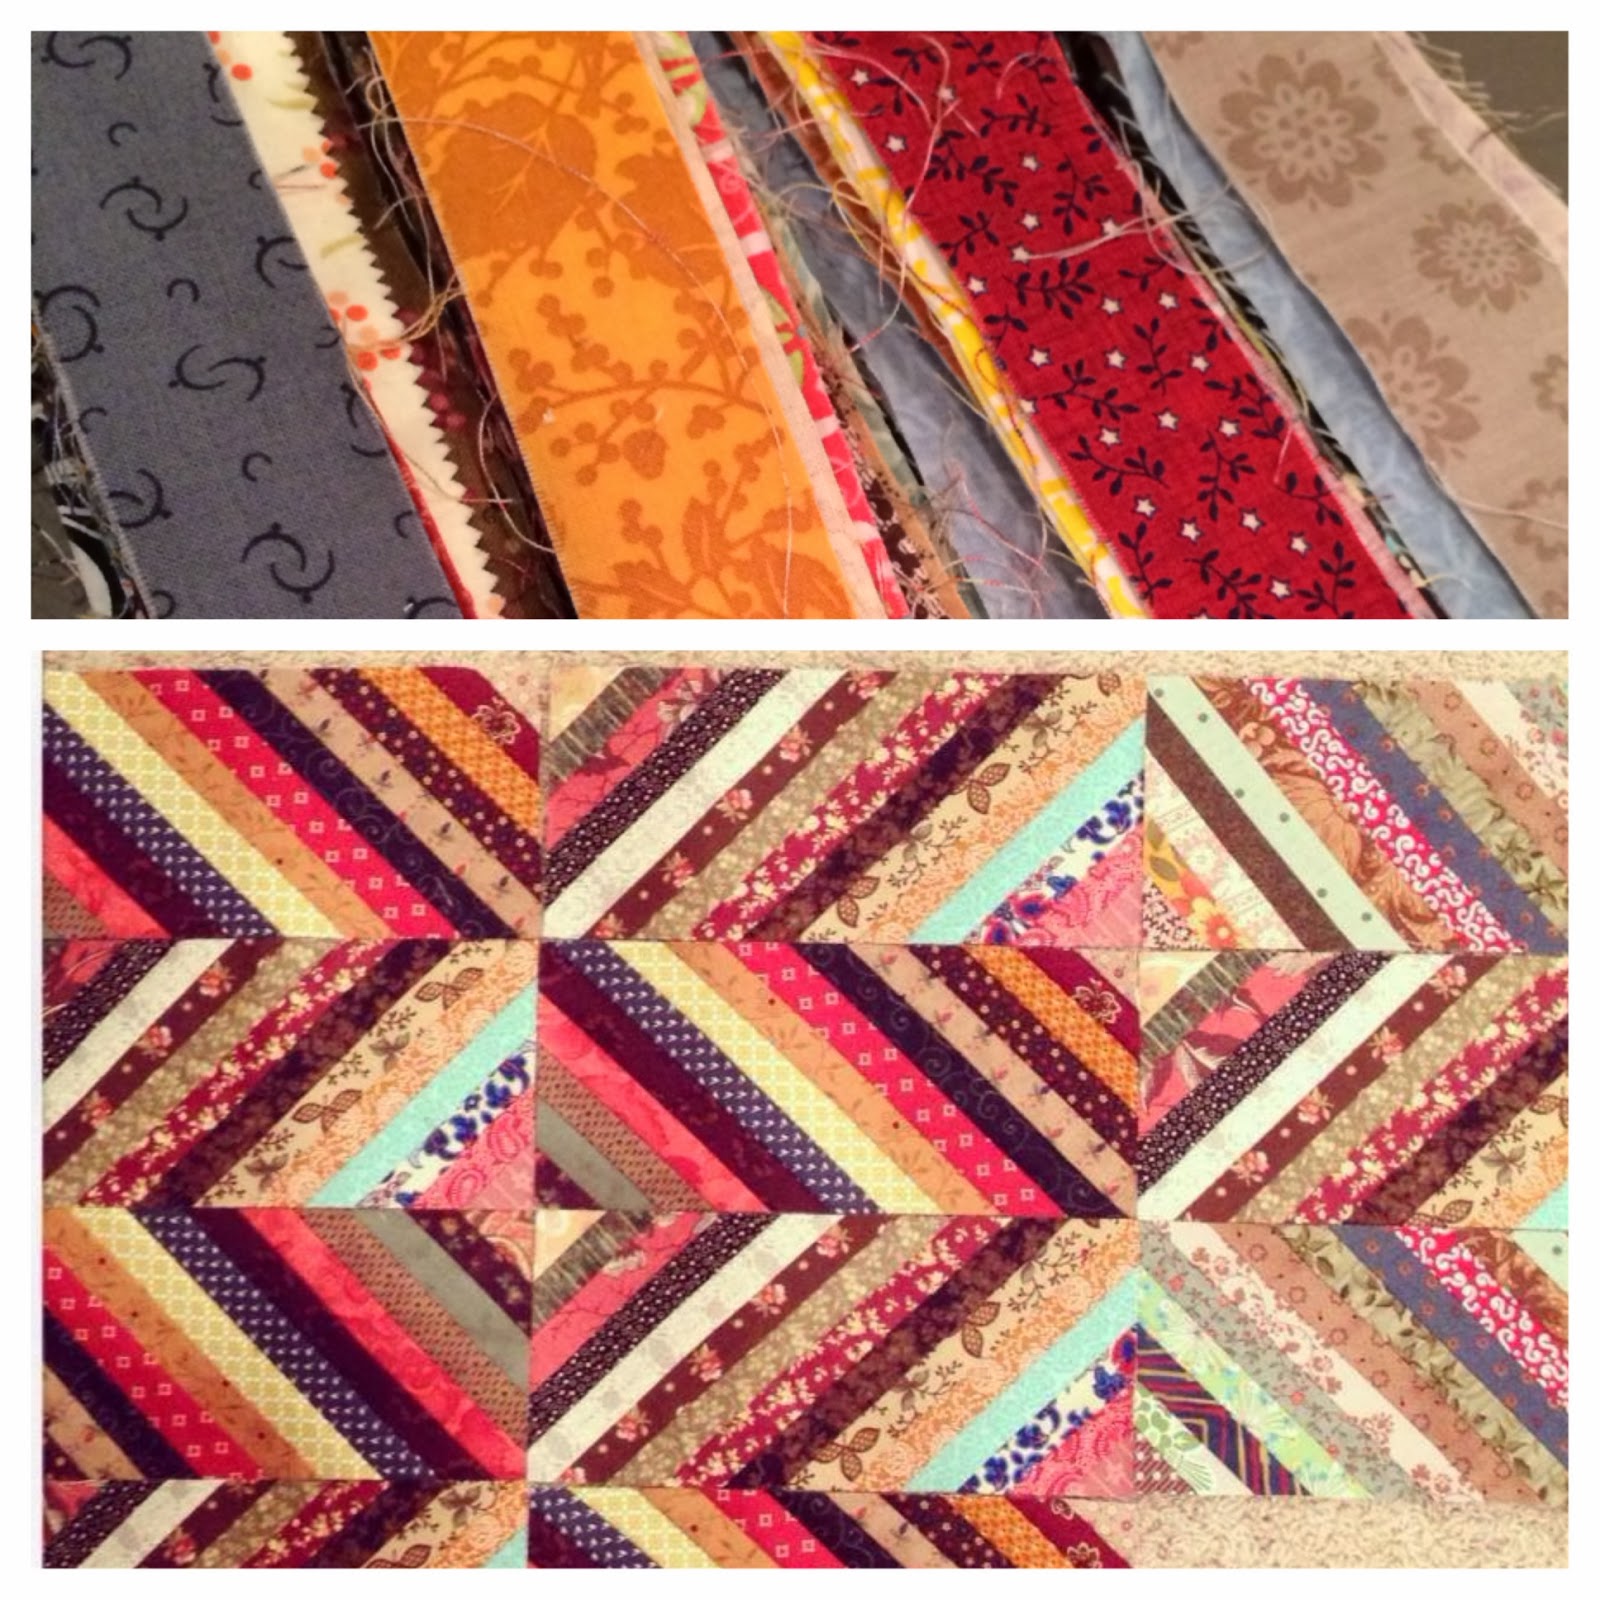
This quilt all started after I did a 1.25" fabric strip exchange with 19 of my clients/friends.  As I started sewing my strips together, I knew I wanted to do something a little different.  So I just started grabbing and sewing them together, no rhyme or reason...just fabrics that contrast well.  This would be a great friend fabric exchange project!!

This quilt measures: 63.5"x71" (it is unquilted still, so it could shrink a little in size) 
It is 6x16 blocks, which is 96 block total. 
The blocks measure 5"x11", and are laid out horizontally. 
You will make 20 strip sets, 10 one direction and 10 the other direction.  (more on that later) 
So, you will need (300) 1.25" strips.  My strips were the full width of the fabric. (between 42"-44") 
You are welcome to use different widths for you strips, you just need to make sure your set measures 11.75" wide, so when you go to cut down your blocks they will be around 11" in length.
Seam allowances for this quilt are 1/4".   
Also I recommend to shorten your stitch length on your sewing machine, you are going to be cross cutting across your seams and don't want them to come undone.
 Now that my quilt is all sewn together, the parts that I love the most are the pops of color. 
Don't be afraid to throw any color or style of fabric in. 
I would just recommend you use all 100% cotton fabrics.  Nothing that is stretchy.
 I think this picture illustrates what I'm talking about with color.  You also need to have contrasting fabrics.  You can see the blocks on the right don't contrast as well as the others do.
Its up to you, but I recommend dividing up all your strips into groups.  That way when you get down to your last few sets you aren't stuck with fabrics that don't contrast well.  You are going to make 20 sets of strips.  I used (15) 1.25" strips in each set.  If you are going to use different widths of strips, adjust your amount of strips accordingly.  If you do add different widths of strips to your sets, remember to make sure your sets are 11.75" or wider.  (you don't need to go bigger than that, otherwise you're going to have more fabric waste). 
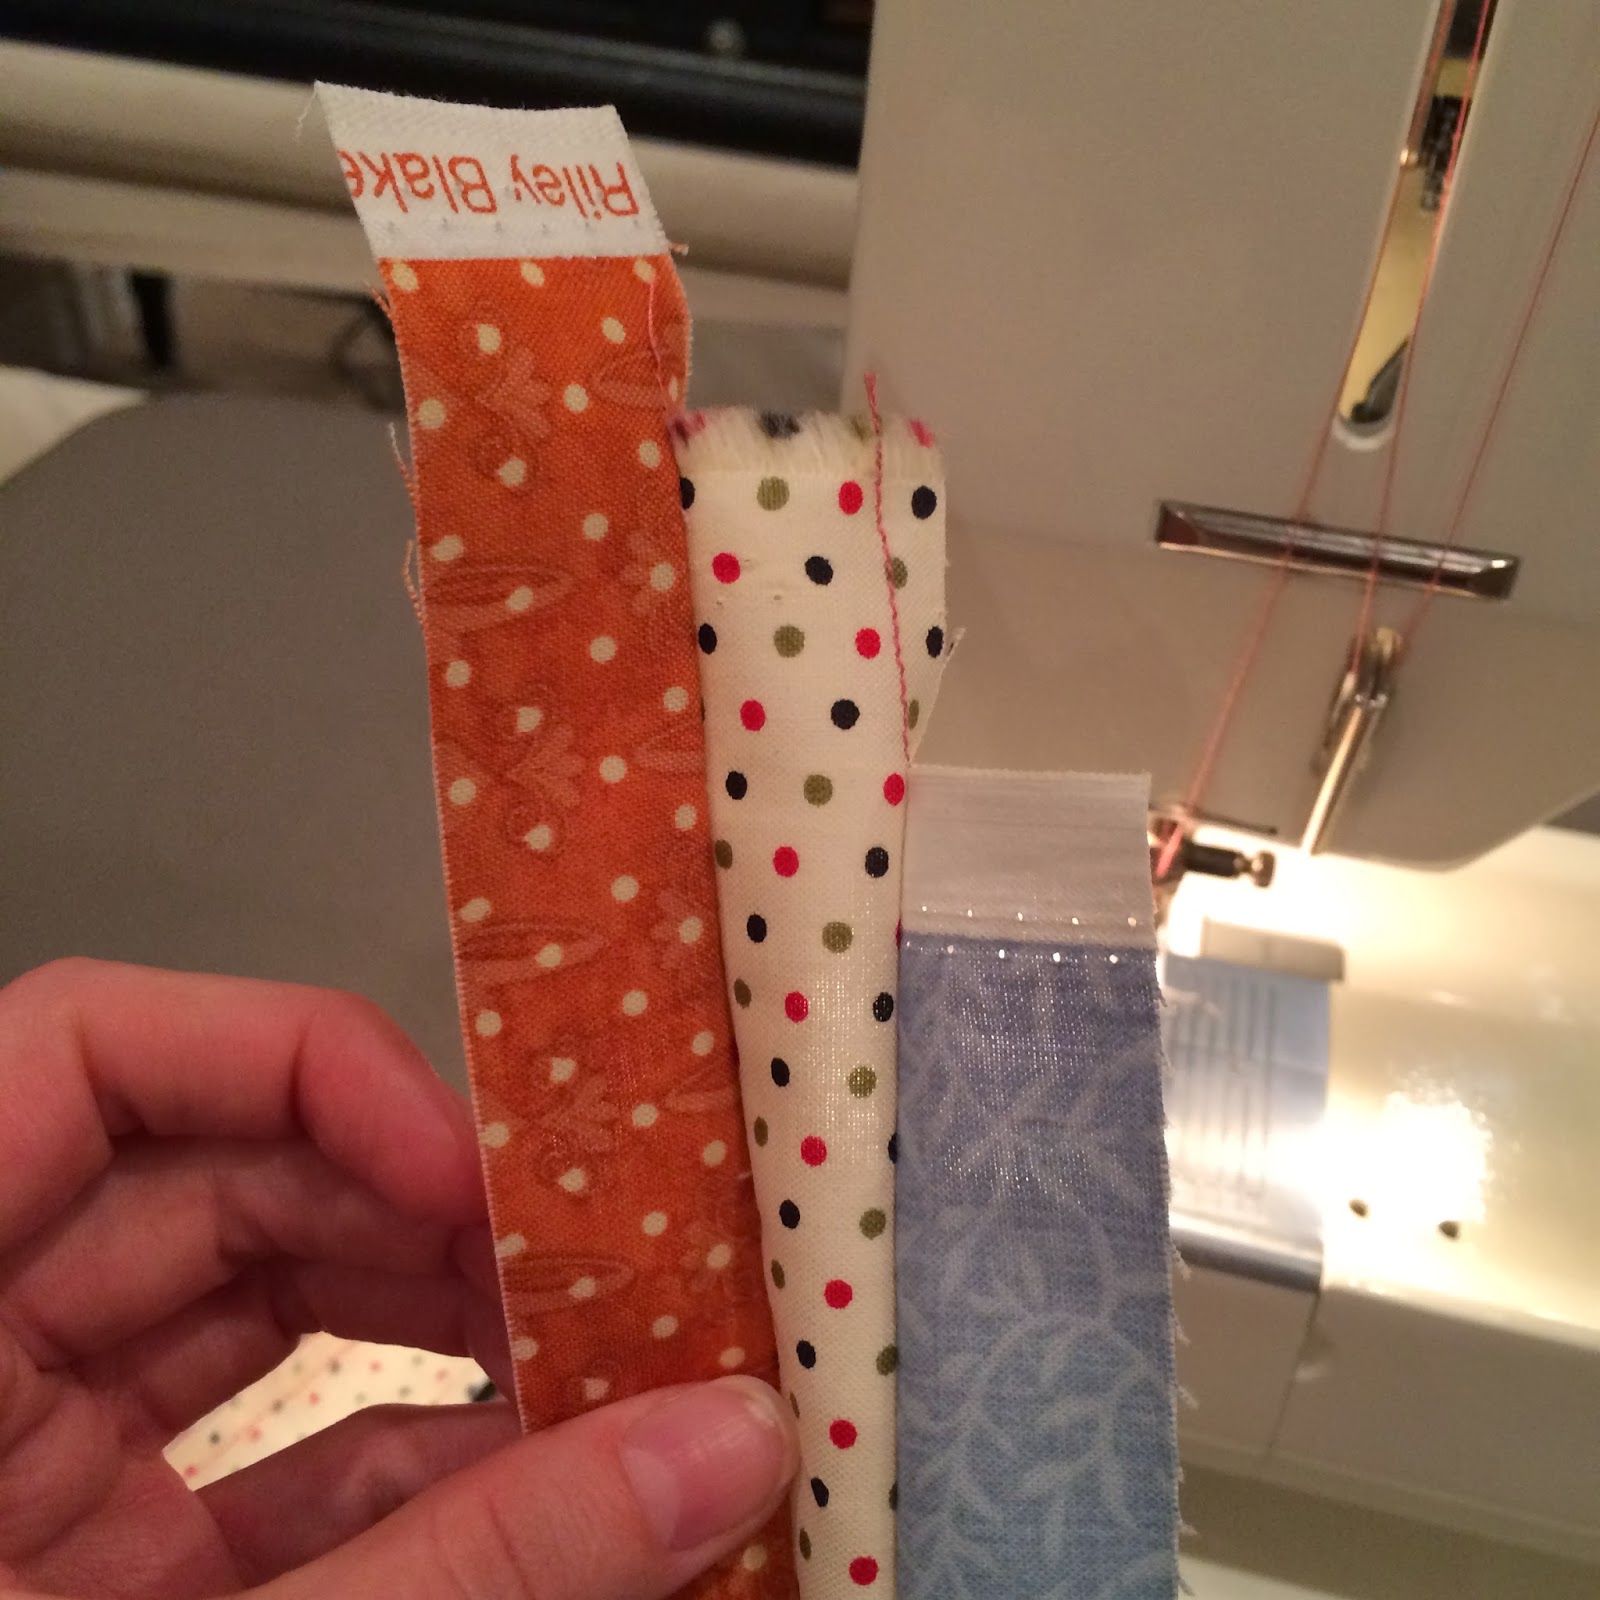
Time to start sewing!  These are instructions to the angled down set.  You will make 10 sets of these blocks.  To save on fabric waste I move each top strip, as I'm sewing them on, down an 1".  Like pictured above. 
 Like so.
 Open it up.
 Line up your next strip and start sewing.
 Then open it up again and continue doing the same thing for all 15 strips.
 Like so.
 While sewing your strips together be careful to sew straight lines and don't pull on your fabrics, as you sew.  If you're not careful you can cause your strip sets to start curving, which makes it difficult to correct or cut later on.
 Straight strips should look like this.  If it starts to curve on you correct it before you continue to sew, otherwise you'll create a bigger problem to fix.  If it continues to give you curving problems you can alternate sides when you are sewing, I've heard that helps.
Here are all 15 strips sewn and ready for pressing! 
 This is the top end.  You can see the angled down slant.  By sewing your strips on an angle like this, you will be able to get 5 blocks per set and you will have less fabric waste. 
 Another view of the top of the set.
This is a view of the full length of the set.  You need to make 10 sets of this downward angled set.
Next you are ready to press.  I will show you how to sew the next 10 set later, after I show you how to cut these ones.  I recommend pressing your sets upside down first and also sideways.  You may be tempted to lay the full length on the ironing board, however major stretching can occur while ironing if you do.  I found I have better control of the stretching if I start pressing upside down and with the set laying width wise. 
 I press the seams all in one direction and actually start pressing towards the middle first and work my way to the ends. 
 When I am done pressing the entire back I flip it over and press the top of the seams better.  This is also good so you can catch if you didn't press a seam open enough, and nice because you'll have less stretching and curving.  Press all 10 strip sets this way.
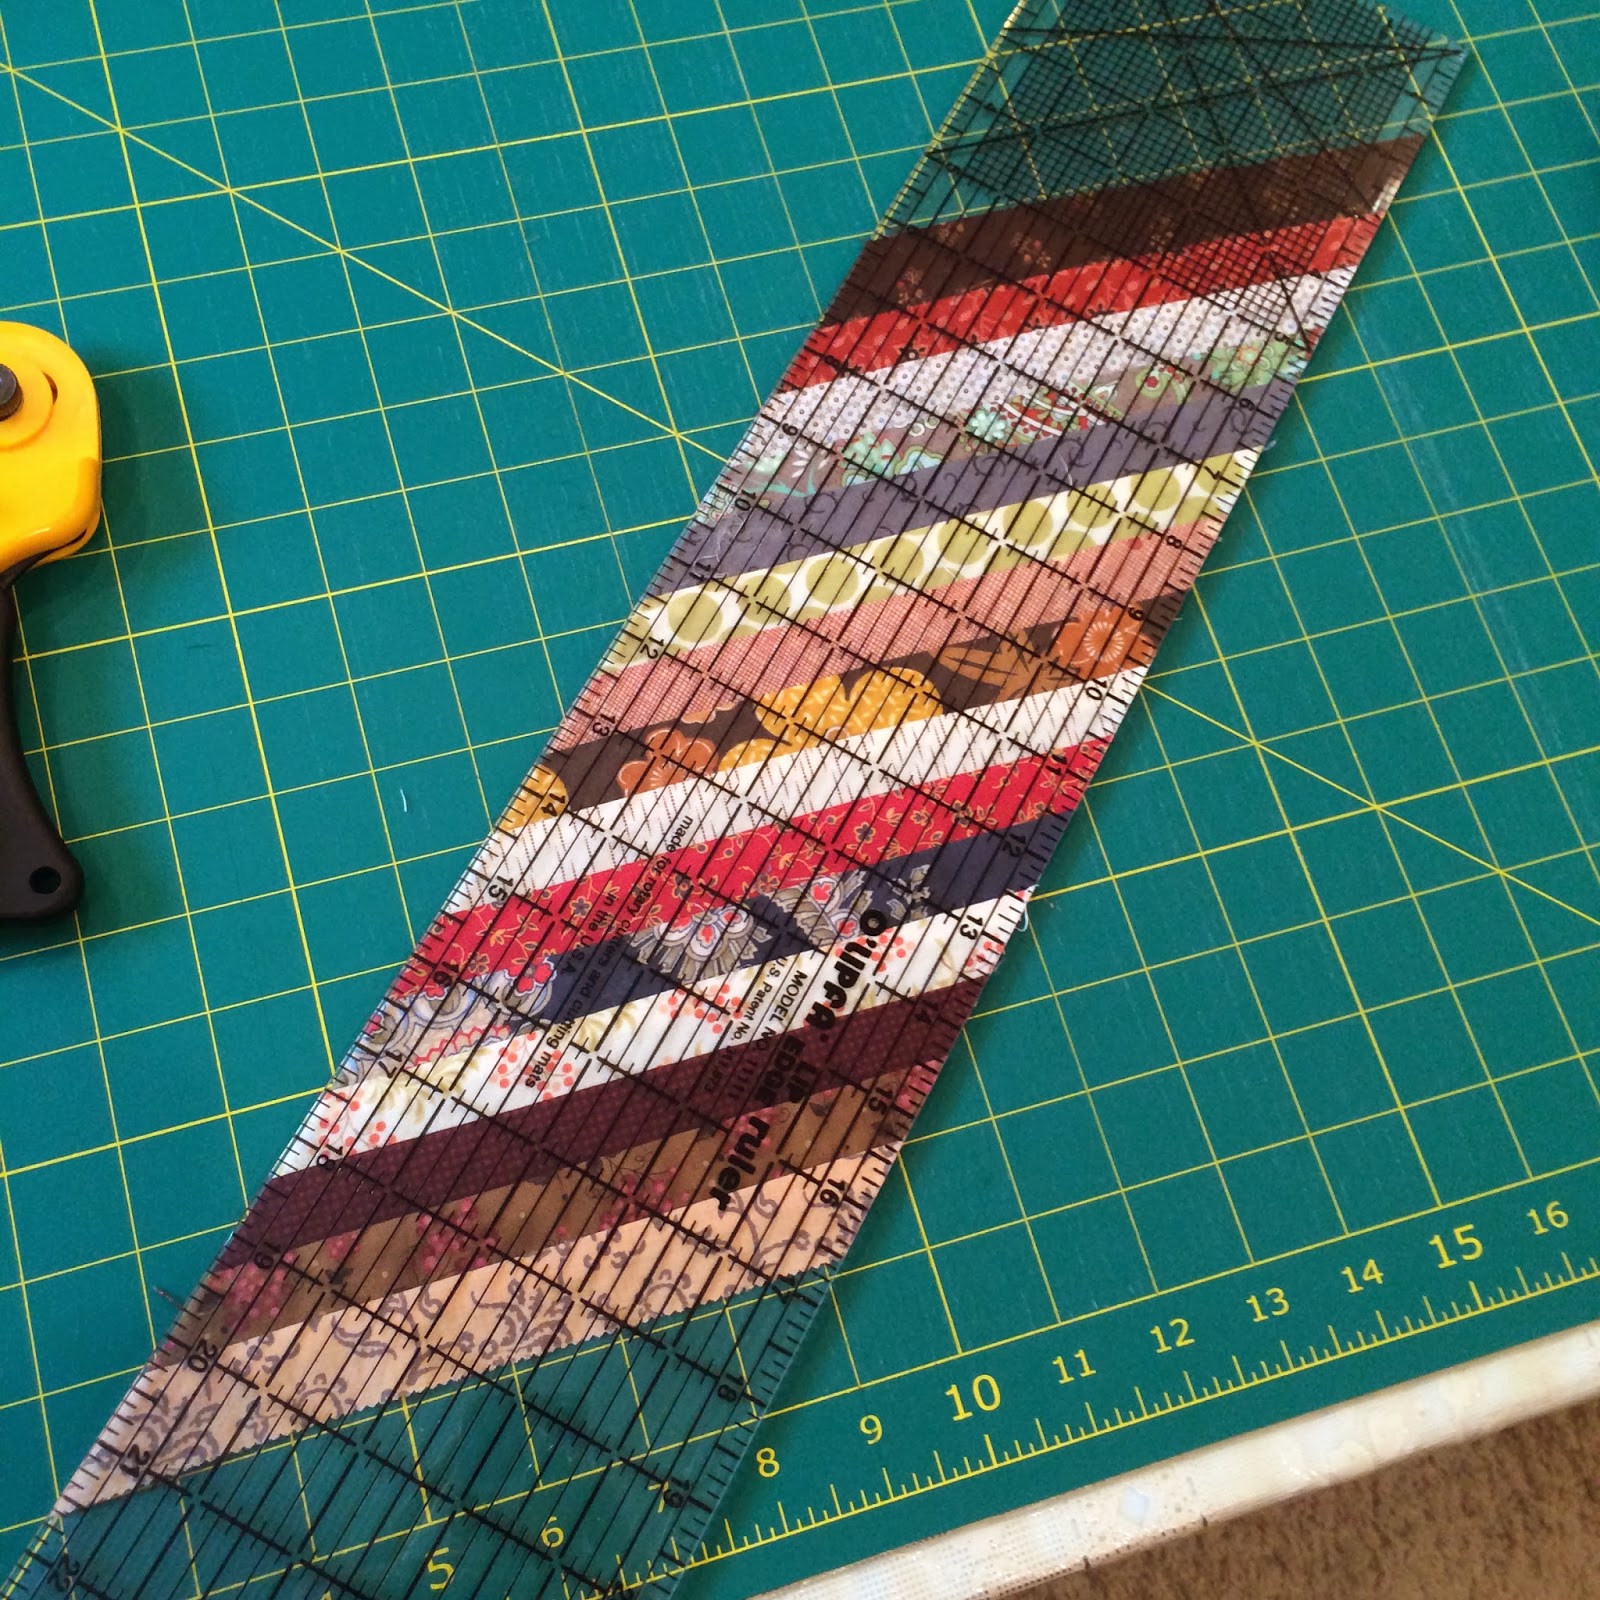
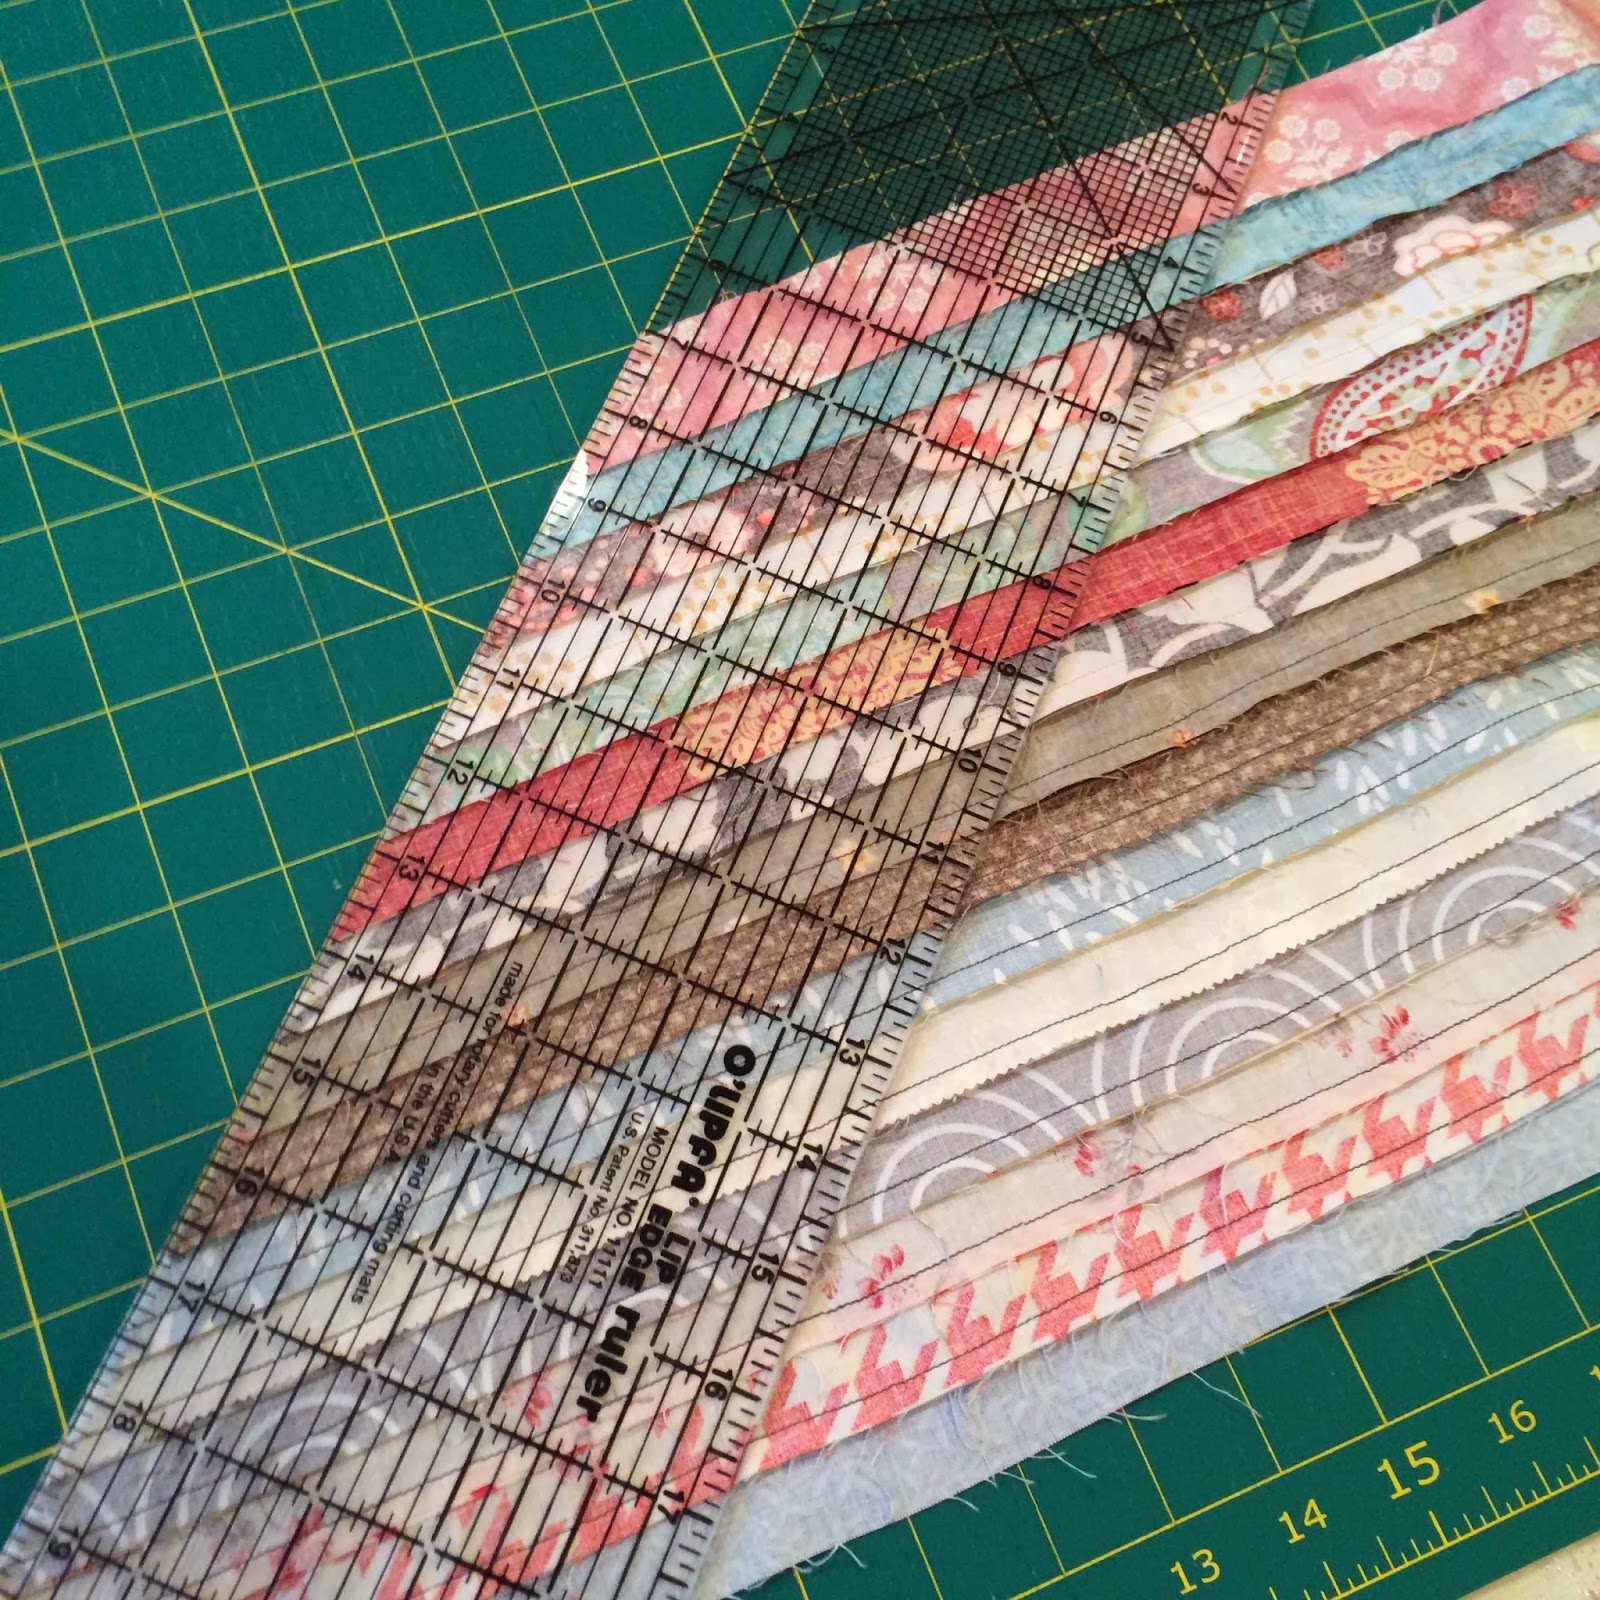
 Make sure your cutting matte has a 60 degree angle.  This is what you are going to use to help you cut your blocks on an angle. 
 Next you are going to lay your block on the matte lined up to the 60 degree angle, as close to the end of your strips as possible. 
 Like so.
 Like so.
 Then take your ruler and rotary cutter, using the angle line as a guide and cut off your end.
 To make things simple for myself, I used the width of my ruler (5") for the width of my strips.  So I line up the left side of the ruler to the angle I first cut, and make another cut.
 Like so.
 Your strips should look like this.  Cut the rest of your blocks, which should total 5.
 And this.
 Here is the fabric waste from the top end.  If by chance your strips weren't quite long enough to get a full 5 blocks, you can unpick some of your fabrics from this front left over strip to add to the part that was too short.  This happened to me a couple of times, and was an easy fix.  It was always one of the first three fabrics, so I would just unpick that strip and sew it onto the block it is needed on and then trim it up like the others.   
 This is the bottom end.  Not much waste!!  YAY!
 So, your 5 blocks should look like this.
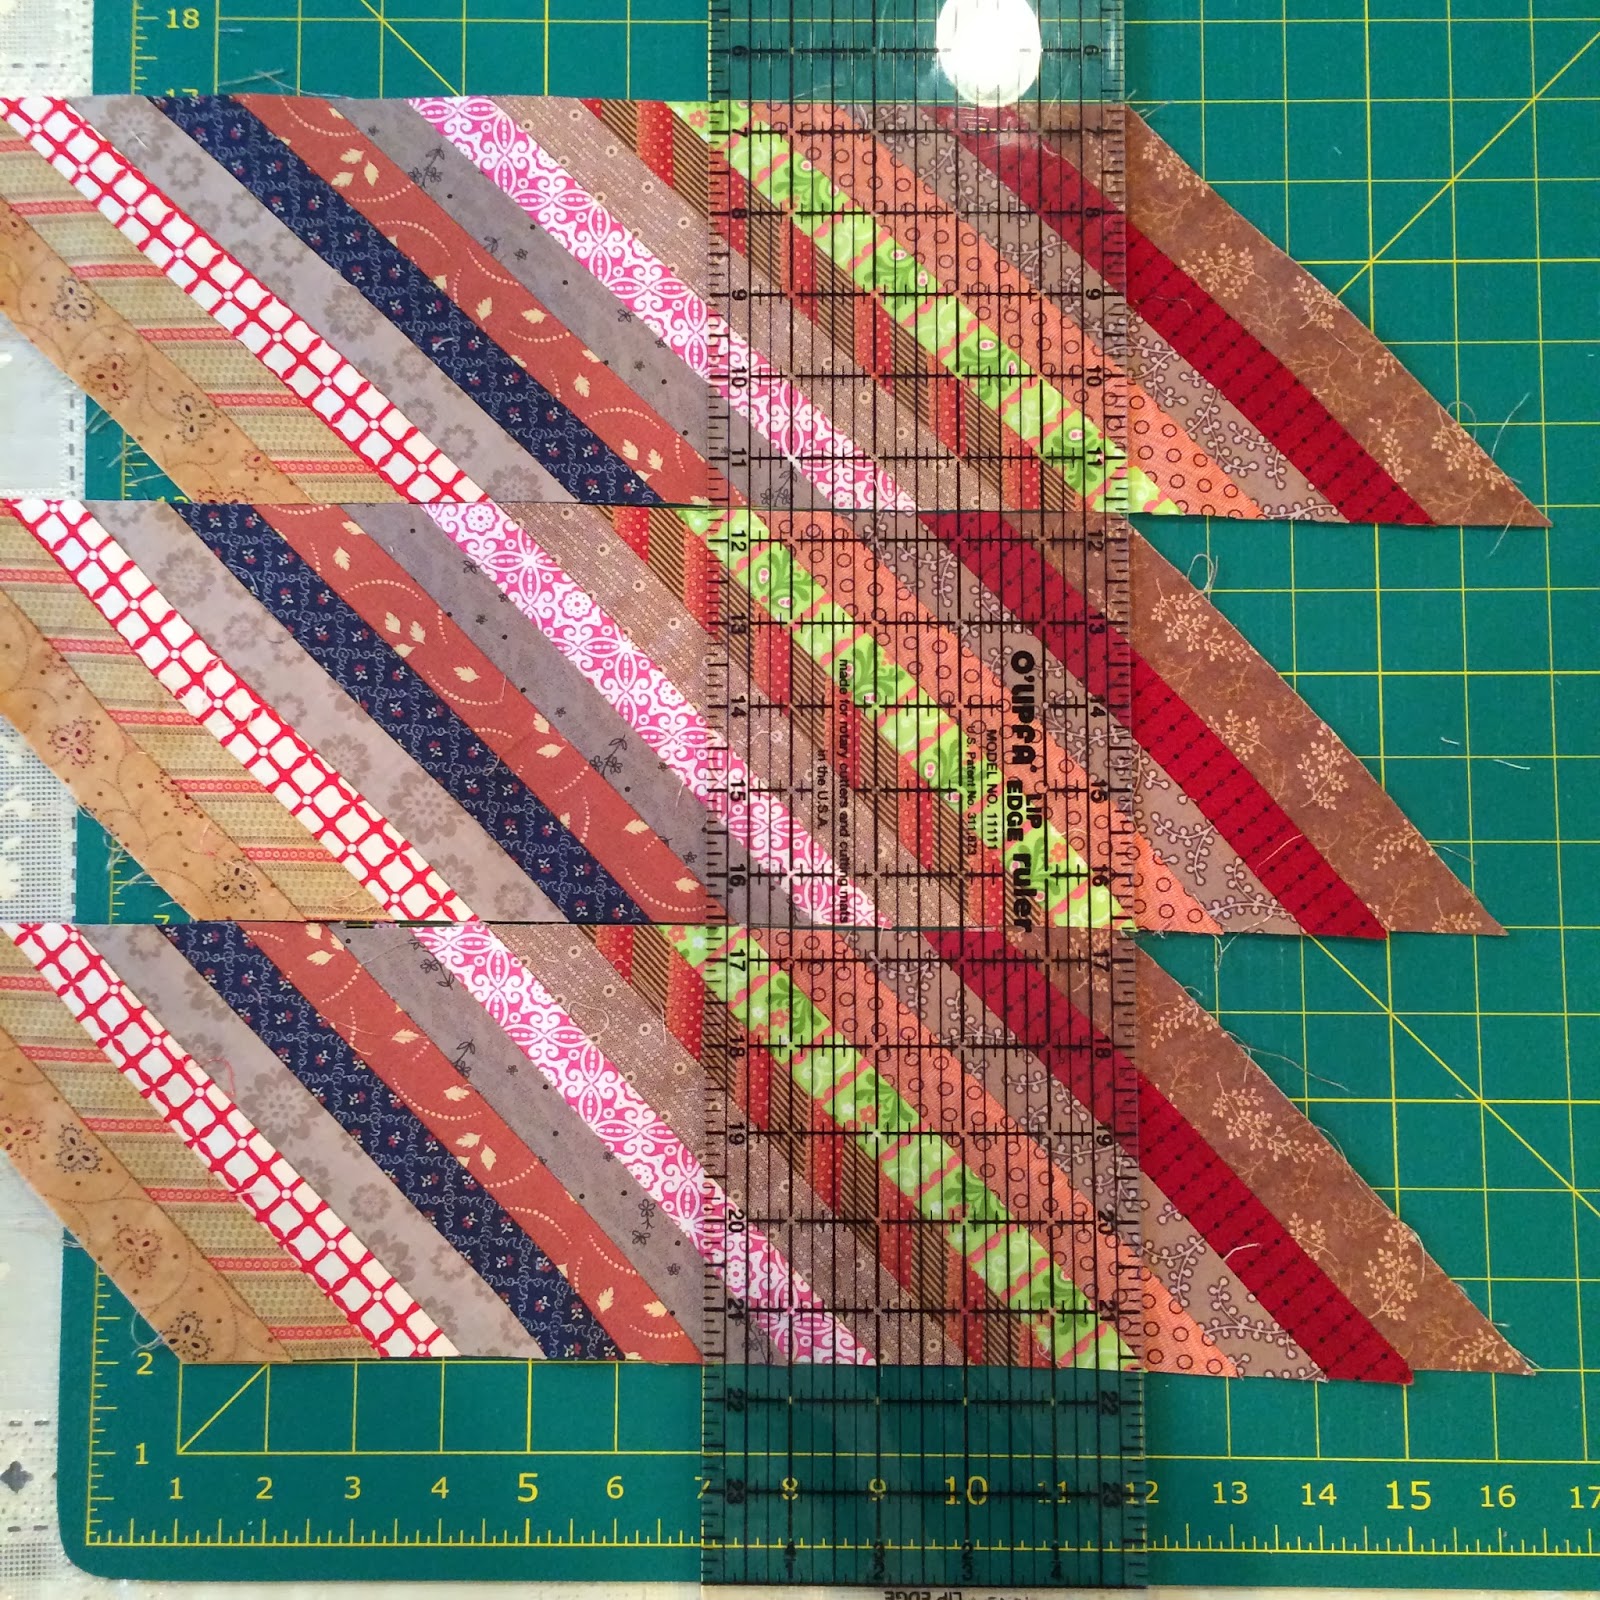
 Next line them up, so you can square up the ends.  You are going to want to cut the ends off right at the point where it starts to angle down.  So, your block should be cut at 11" in length.  (If you used different widths of strips, other than the 1.25" size that I used, this is why you need it to be 11.75" in width.  Explained above) 
 You will cut the right side of each block like so.  I'm cutting on the 12" line in this photo because I have the block starting on the 1" line.
 Line up the ruler, cutting right on the point, and cut off all the left sides of the block.
 There you go!  Cut all of your blocks this way.  You should have 50 blocks total.  5"x11"  
 If you would like to line up your blocks and cut three or four at a time you can, just make sure all your points are lined up.  There is no extra to make up for a bad cut on the other end.
 Squared up!
 You will have several of these leftover....maybe we should create something else with these...keep them, you'll never know what we come up with next! 
Now for the next set of 10!  If you remember you sewed your other strips going down.  As you sew these you will up.  As you add a strip it should be an 1" or so higher than the strip underneath.  This is what your set of strips should look like.  Make 10 of these sets.  Press them the same as the other strips.  (instructions above) 
 Now you are ready to start cutting the strips.  Line up your set, using the same 60 degree line on your matte.  If you notice in the picture above, you will need to lay your set upside down...yes your seams should be up.  You won't be able to cut it if you don't lay it upside down, the angles wont work for the 60 degree angle on your matte.  This is also how you get your different angled blocks.
 Line up your ruler on the 60 degree line, like you did with the last block, and cut on the line.
 Like so.
 Line up your ruler and cut 5" or the width of your ruler.
 Your block should look like this.
 And, you should still have 5 blocks per set.
 Line them up and cut at the point, should be 11" in length.  Remember to make sure your points are lined up.
 Like so.
 After you cut off the left side, they should look like so. 
Fun huh!!!  Cut all your sets, and you should have 50 of these blocks total. 
 You can see the difference in the angles with all my blocks lined up ready to lay out.
Okay, so when I lay a quilt out if I ever have any blocks that are the same I make stacks of all the same ones to help ensure I don't over use one block. 
 Starting to lay it out.  The quilt is 6 blocks across by 16 blocks down.  You will lay out the quilt every other block to create the angled pattern.  You will have a few extra blocks leftover. 
I move the blocks out of the straight line when I've used them.  (that is why some blocks are pulled out)  Or sometimes I will take one of each block and make sure I use them before I use any more.
 All ready to sew together.
 First its good to check it out with my "Sew Red Glasses".  If you haven't heard of them click this post, you'll learn how awesome they are!!!
 Fun to show the back, that is a lot of seams!!!
 All sewn and ready for quilting!  When I sewed it together I just pinned the block seams.  I didn't worry about pinning all strip seams, because they didn't line up...unfortunately my strips weren't all cut straight and 1.25" exactly.   
 I'm thinking this will be my quilt back (tan fabric) and binding (red fabric).
 As the sun was getting ready to set.
 Close up.

 Don't they look lovely together! 


This was a fun quilt to do, but I am so glad to have it ready to quilt!
 
Please let me know if you have any questions.  Thank you, and Happy Sewing!!
 
............................................
 
This is also the same cutting technique I used for a herringbone quilt I made.
 I sewed 2.5" strips together in sets of 2.  Pressed and then made sure to cut half of them right side up, and cut the other half upside down.  I think I cut them at 7" long and of course you don't square them up on the ends, you just sew them to each other in a vertical line and you have the row sewn together before you know it.  I did pin these when I sewed the rows together, fun fast quilt!! 
 
 
~ leisha