
Last year, in April, my aunt Kristin did a quilt along on her and my mom's fabric and
quilting blog, http://sistersandquilters.blogspot.com/. Each week she shared
time saving tips and great technique's, as well as great instructions for each block. If you're interested head over to their blog and check out the first Apple Pie in the Sky blog post. The other posts can be found in the posts written through July 17, which is the finale post.

This is a computerized image of the quilt that Kristin designed and
one of a few options that she has available on their blog.

When I saw the Indigo Crossing fabric from Minick and Simpson, by moda,
I knew that is what I wanted to make my sampler quilt out of.
I added some tans and light blues to give it some color variation. The navy is my favorite!

I'm excited to show you the oodles of pictures below and talk about the quilting.
To start with, I used two battings for this quilt. A base layer of 8020 cotton/poly blend and a top layer of wool batting. I have never used two different battings together before, and these two are a winning combo. It gave the quilt added texture and a very nice puffiness.
I used dyed natural 30 tex Perma Core A&E thread, on the entire quilt...only 5.25 bobbins.
Did you know if you wind your bobbins slower you'll get more thread on them, helped me for sure.
This quilt took me 17 hours to machine quilt. Every stitch on this quilt was made using a straight, curve or circle ruler. I didn't have to mark my quilt with a quilting pen very much because of the awesome A1 ruler that I use. I will talk more in depth about the rulers at the bottom of this post.

I finished sewing this quilt together last October while we were having a sewing weekend away from home. I wasn't really in a rush to quilt it because I wanted to give myself time to think about how I wanted it quilted. I was undecided about what to do in the sashing, going back and forth between a couple of ideas, until recently. I quilted a bench pillow front for one of my friends Barbara, and did some four pointed stars in the corner blocks. So, I was super excited to pair those stars with the 1/4" pinstripes in the sashing, which frame each of the pieced blocks very well. I used my awesome A1 ruler for all of the stars and pinstripes, because the ruler has 1/4" lines no marking was required.

Another view of all that shashing...love!

Because it is hard for me to get a picture of the entire quilt,
here are a few pictures in groups.


Now...let me show you a closer look at the 20 blocks that are in this quilt.
I decided to do a diagonal 1/2" line in the background of each block to tie the blocks together.
The quilt along has 12 blocks, and I knew that I wanted to make mine bigger and have them square instead of on point, so I will name the ones that are in the quilt along to help you.
For the blocks that I created on my own, I just used the same dimensions that Kristin used. So, looking at this first block there are 6 squares by 6 squares. I then went to her quilt along block patterns and searched for a block that also was 6 squares by 6 squares, then I knew what the dimensions would be for 1/2 square triangles and squares...all I had to do was lay them out in a different way. The extra blocks I did, I saw on blogs, pinterest, or instagram...did a screen shot on my phone and then used them when I was ready. Great way to build up sewing and quilting ideas.
- no name -
.JPG)
This block really stumped me when it came to quilting. The angles on the navy check pieces were a bit tricky, but in the end I love it. I did a lot of arrowhead lines through out this quilt, which goes well with all the points and shapes. The quilting in the center pinwheel adds movement to the block.
.JPG)
The outside arrows add depth and texture to the block. After I finished quilting the quilt I decided to come back and add some curved lines to the dark navy shape, which may be easier to see in the picture of the back of this block below. Adding different lines and
curves to a block as depth and texture...which every quilter loves...am I right?!?!

- Pinwheel block -

I wasn't quite sure how much I liked this block, but now...its one of my favorites.
It was the solid squares that I didn't care for, but now because of the quilting, I just love it!

I want to show you a couple of different views of each block and then the back ground because of all the quilting. Some pictures show parts of the quilting better than others, so hopefully it
will help in seeing the all the detail. In the pin wheels on this block I did an
arrowhead line in the white fabric and left the navy fabric unquilted, which makes it pop!
This is the only block that didn't have any background fabric, which means no diagonal lines.

- Apple Pie block -
With the quilting on this block I started with a military chevron. Have you ever seen the patch that military men and women wear on their uniforms? That is the chevron that it is inspired by.
I added pinstripes to the rectangles, arrowhead lines to the inside flying geese and a burst of lines in the outside flying geese...hoping to create a little movement and a whole lot of texture.

An angled view. I did have to mark this block to make sure that military chevron was right. When I do mark a quilt I use a blue quilting friction pen, which disappears, and only mark a small dot. Then use my ruler and do some dot to dot quilting. To get rid of the dot or make it disappear, I use my hair dryer. Don't hold it close or you will burn your quilt, but a few seconds close to it...and its gone!
Below is a great look at the quilting on this block...loving all that texture.

- Bear Paw block -

The quilting on this block is super simple. I quilted hard lines using my A1 ruler, and a gentle curve line in the very center using a DeLoa's Boomerang 20" finished ruler. The very center of the block is cross hatched squares at a 1/4". The navy triangles along the edges were left unquilted and they pop!

The added back ground diagonal lines sure add great texture to each block.
Below is a view of the back of the block.
- Whirlpool block-

I love this design of this block. Two pinwheels, one on top of the other, spinning in different directions. To add movement to the navy pinwheel I quilted lines to follow the diamond shape and one straight line down the middle. The lighter blue triangles have half of a 4 pointed star in them to add interest and texture. The very center on point block mimics the same blocks I quilted in the pinwheel block above. I find to make a quilt like this, with so many different block designs, cohesive in the quilting its great to repeat shapes or designs throughout the quilt.

Another great view!
Below view of the back.

- no name -

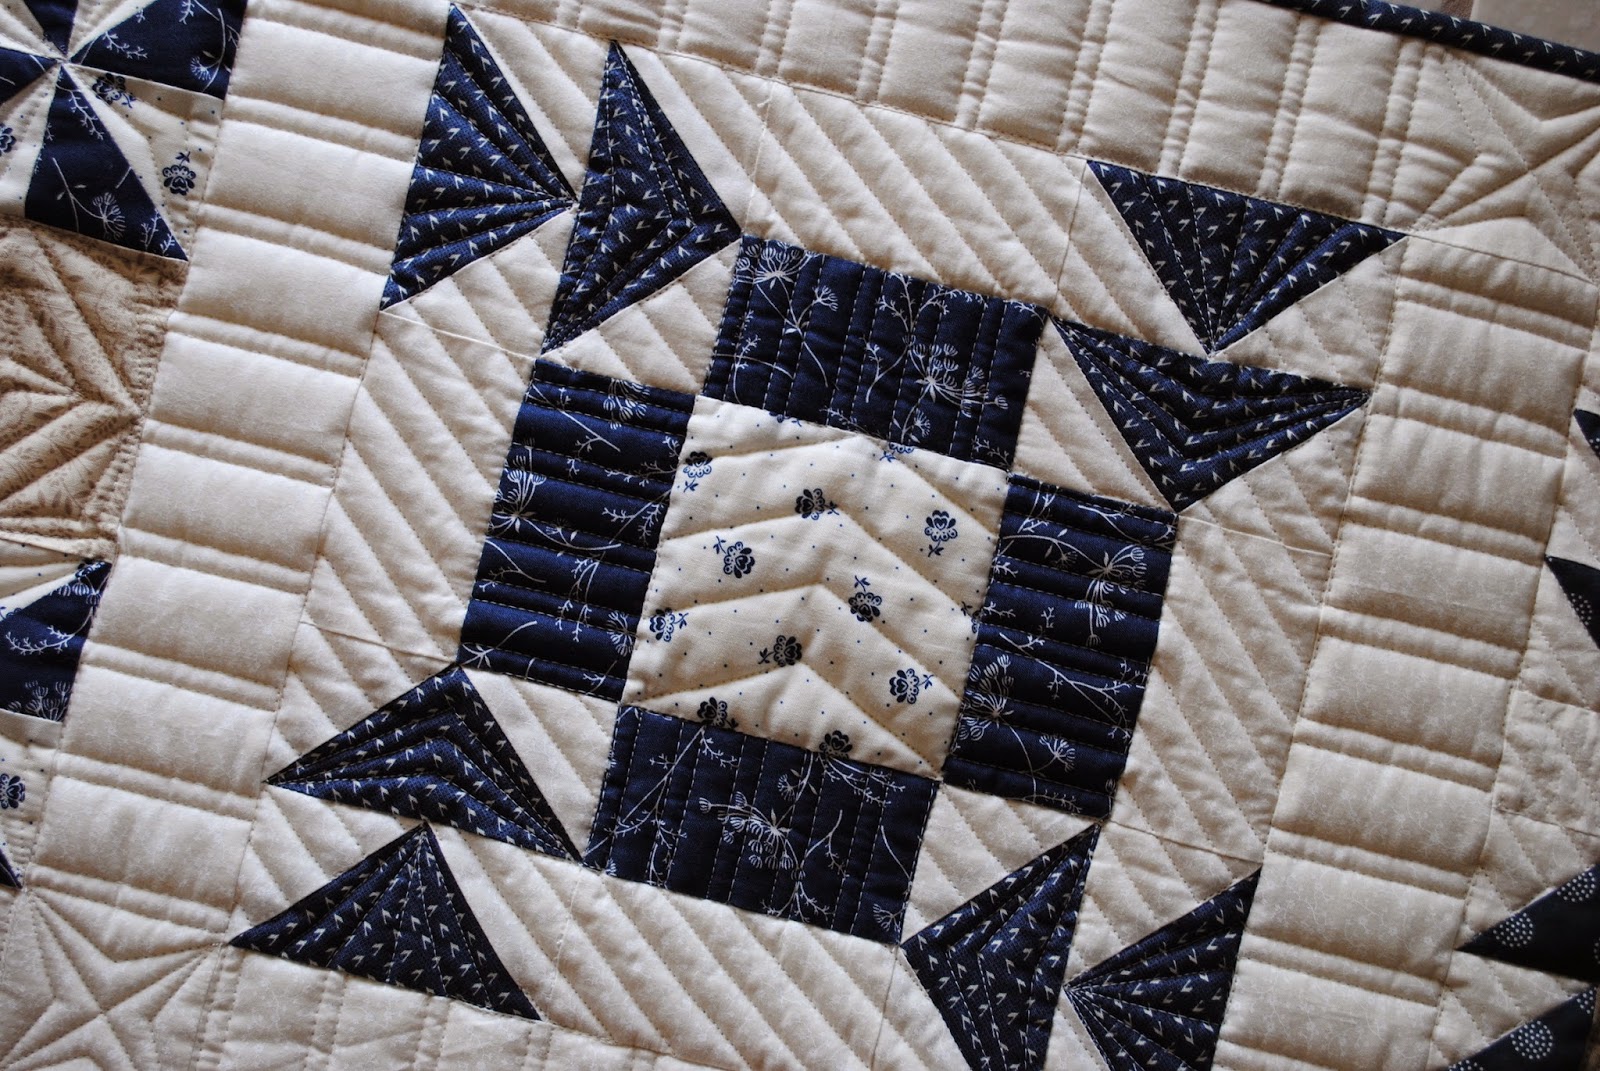
If you look close at this block it is flying geese, 1/2 square triangles, and a center square.
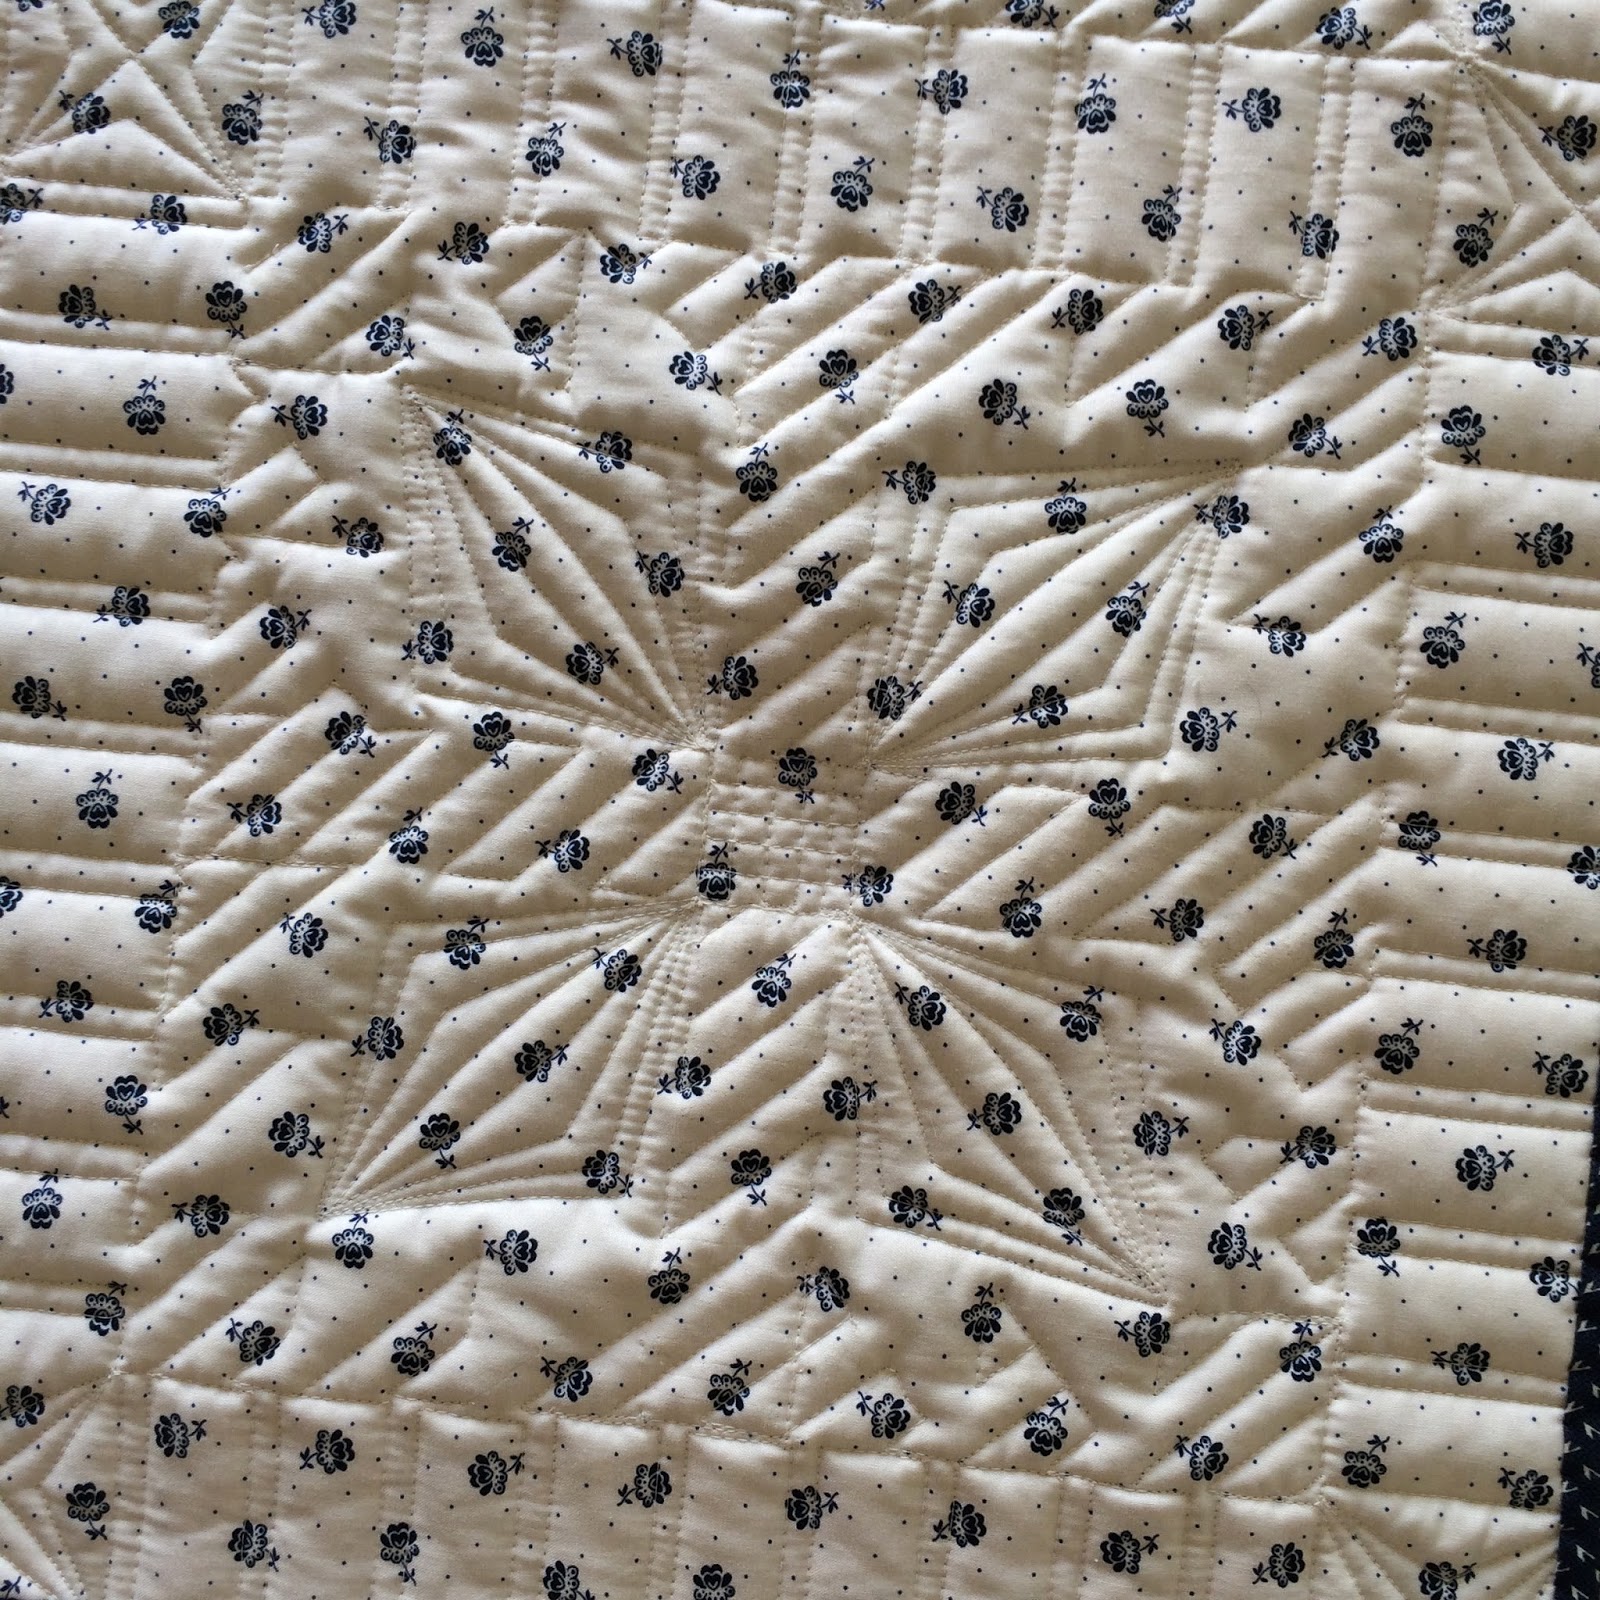
The center block quilting, (see picture below) started out as a star and turned into looking like a wrapped candy. I love the play it has in shape and texture. The tan edge quilting, frame out the block. I also love that the diagonal lines play such a big role on this block.

Another couple of views of this block.

- no name -

I was worried this block didn't have enough color variation...needed my Sew Red Glasses,
now that its quilted I hope it helps the different parts stand out!I started with a center on point 4 pointed star, added the curved lines using my boomerang ruler, then added the 4 pointed star...like in the sashing, and finished it off with some pinstripes and the 1/2" background diagonal lines. Man, that is a mouth full. haha! This block has some of the best movement on the entire quilt, all because of that curve. Lots of yumminess for sure!

I love how the light shines on this quilt.
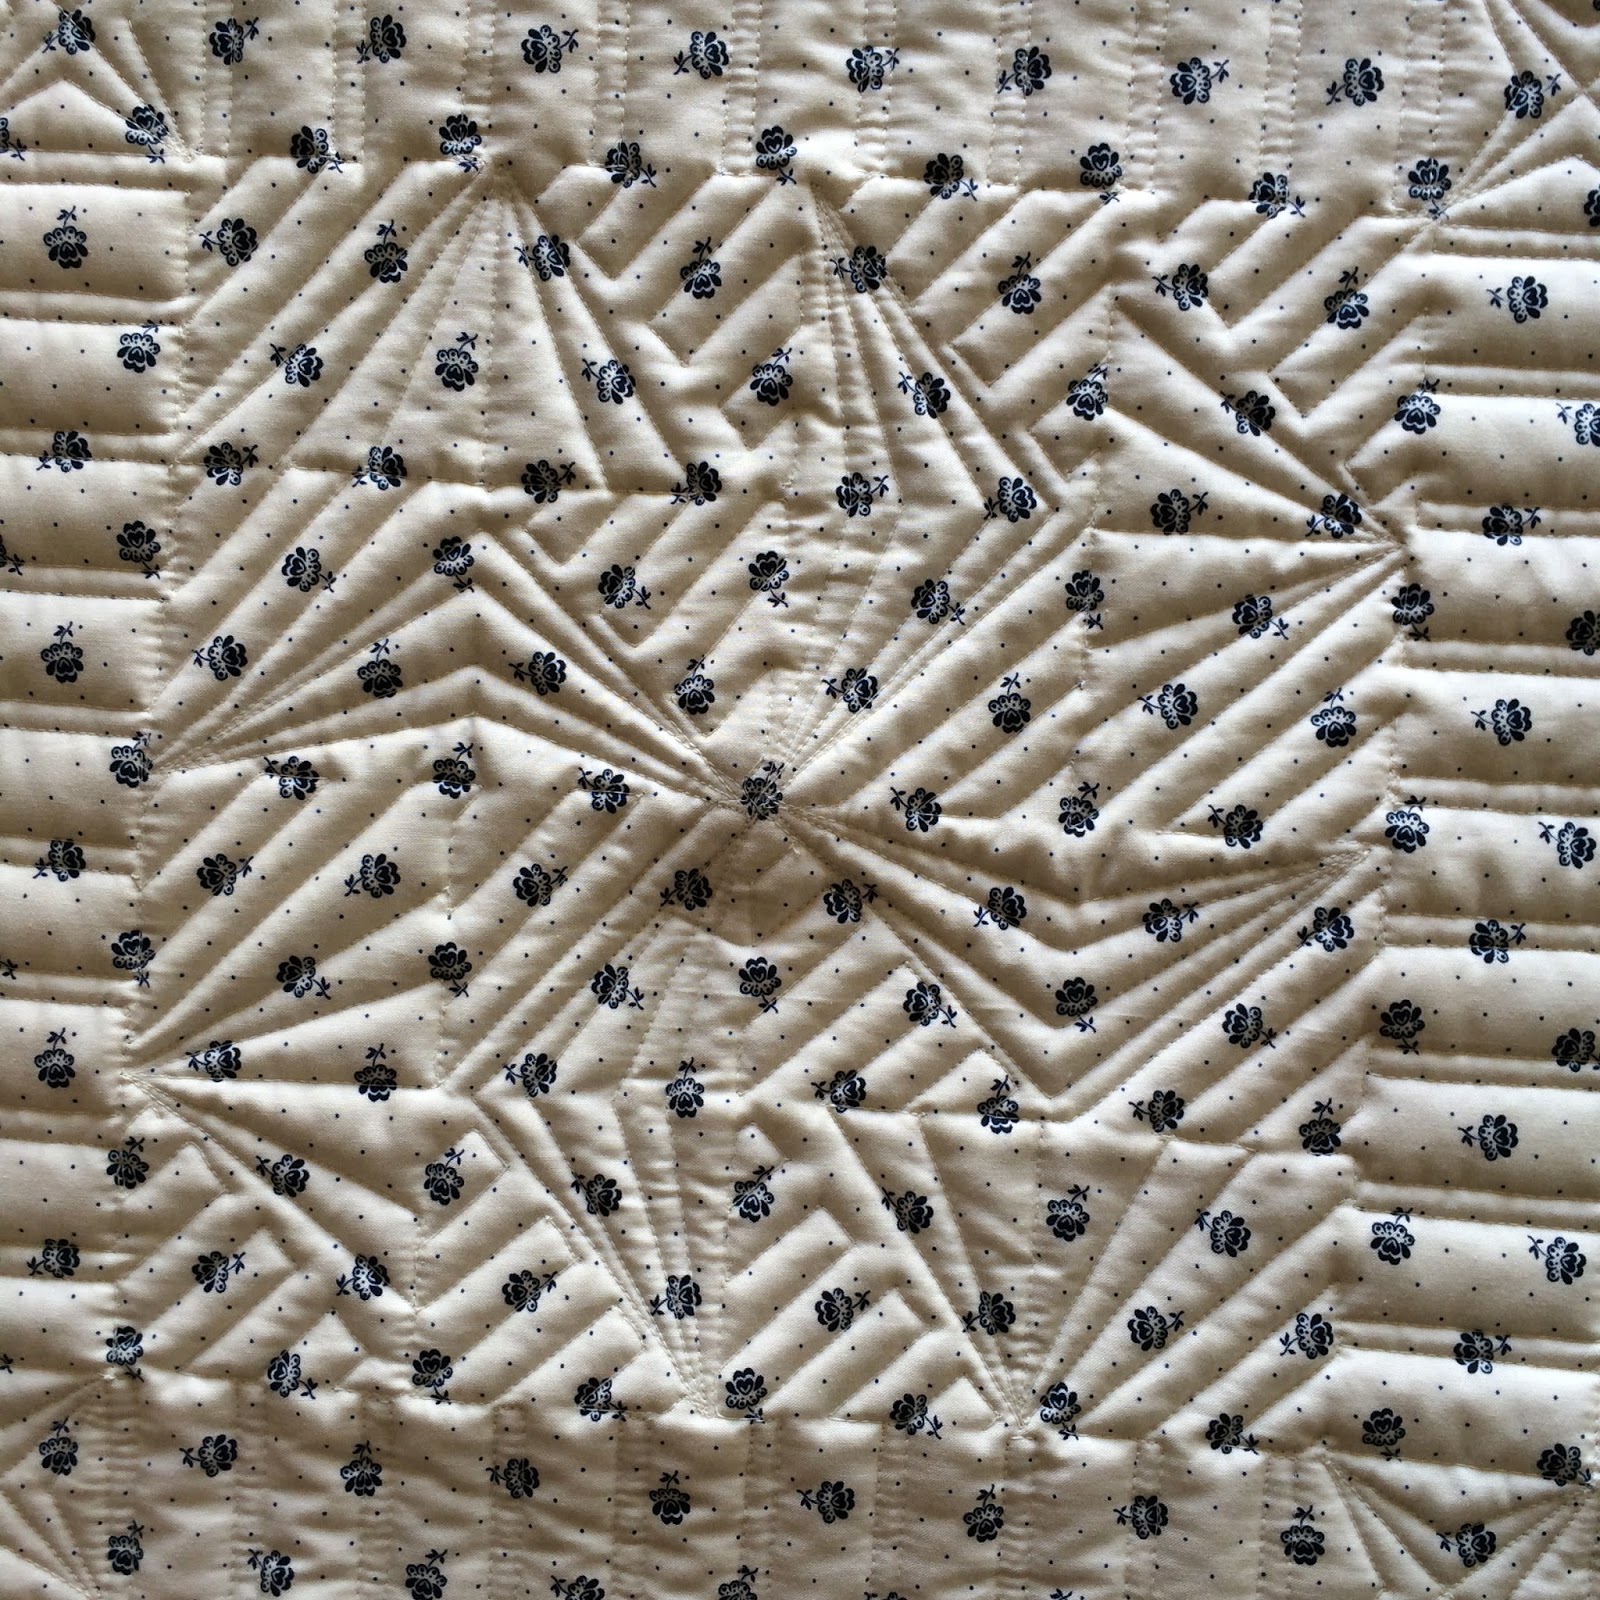
...this also happens to be my most favorite block to look at on the back of the quilt.

- Yankee Puzzle block -

The quilting on this one is super duper simple...lines and more lines.

The inside lines are in a arrowhead shape to create movement, and the outside line are bursting!
A view of the back below.
- Dutch Pinwheel -

This block is not part of the quilt along, but I just happen to know the name of it because I've made this a few other times for quilts. I actually have a super sweet quilt made in browns, pinks, and creams with several of this blocks. I'll have to do a blog post of quilts from the past, another day!
I stewed and stewed over this quilt, because I wanted to quilt it different than the other ones I've done...so I pulled out my boomerang ruler and marking pen and started with the outside line.
Echoed it a couple of times and decided simple is best, I didn't want to lose the design of the quilting by adding more to it...this also creates some movement, the inside pinwheel does that too.

Another couple of views...one a close up.

Back view.

- no name -

This block had dimension before it was quilted.
The outside I used the boomerang ruler to create the slight curves,
and my A1 ruler to quilt those bursting triangles.

The diagonal lines also make the blocks seem like they are floating on
the off white background fabric.
Another view of the back below......

- Garden Patch block-

I started this block by quilting the curved lines, then added the lines in the corner blocks.
I love at the are nestled in the inside of the oblong triangles, look like a flower.

The double batting really added some great texture to this block.
Back view below.

- All Hallows block -

This block may look tricky or time consuming, but Kristin gives you some awesome time saving tips. I coupled two diamonds at a time in the star while quilting to create a arrowhead shape, with a smaller different arrowhead shape in the tan blocks around, but what I love the most is the slight curve in the oblong diamond shapes. So much great texture.

A couple of other views of this block.

- no name -

This was supposed to be the broken wheel block in the quilt along, but I decided to not break the wheel....and I wish that I had. I do like how this block turned out now that it is quilted, the lines are woven into one another, with a star in the center like the stars in the sashing.

Love the light in this picture.
View of the back below.

- Blueberry Pie block -

I was super excited when I saw that this block was included in the quilt along. I've seen it on instagram several times and had wanted to make it. I started by quilting the on point framed star in the center, left the white points unquilted but quilted in the ditch around them, added oodles of lines to the tan arrow shapes, and finished it off with the slight curved lines in the navy diamonds.

A few more views of this block.

The back view.

- no name -

I started quilting this one by making an X, adding a circle on top, then lines and quarter circles in the lighter blue. Finishing it off with the arrowhead lines in the corner triangles.

A few views, close up at an angle and the back.


- no name -

I wanted to add a couple of simple stars to the quilt, and this is one of them.
I cross hatched the center of the star with a 1/2" diagonal line first and then a 1/2" vertical line on top to create the diamond shape. Added some curved arrowheads to the points of the star, then used a circle and the curve ruler to create the shapes in the outside 1/2 square triangles.

Below is a close up view of the cross hatching.

A view of the back.

- no name -

This block took a very southwestern twist when it came to the quilting...love it!

The center has an echoed X, with some triangle and diamond shapes to frame it. The odd shapes around them actually kind of frame it in an awesome way, then some line bursts in the corners to finish it off. With of course the diagonal lines in the back ground adding more texture.

Another couple of views.

- no name -

This is the second of the simple stars that I added. I quilted an echoed plus in the center, with some curved petals in the blue shapes, and simple arrowhead points in the corners.

Texture...love it!

- Key Lime Pie block -

After I did the center on this one, a repeat from another block, and the corner squares...I was stumped on how to quilt the blue layered triangles, so I had to draw it out. This 4 pointed star, that was missing a point...haha, seemed like the perfect fit. I love how all the lines play off of one another.

Another couple of views.

- Clays Choice block -

I love each of the three quilting designs in this block. The hard pointed arrowheads that create movement, along side the long curved lines, topped off with the 4 pointed star in the corners. In fact that top right one is right next to the one in the sashing, and I love it!

Texture and movement, what more could I want! Love!

Thanks for taking the time to look at the oodles of pictures and reading or skimming...haha...through my blabber, hope you enjoyed it, I sure enjoyed making and quilting it.

Several more pictures of the quilt...

Oh, the texture!

How the light hits this, oh love!!!


Views of the back.


I love to see the hours of work that a quilt back has. I am so proud of the quilting on this one!

Thanks again for taking the time to look!
.JPG)
Now, for rulers...these are my fav's!
I use the green A1 ruler nearly every time that I do ruler work. I love the handle it has, on the perfect angle for holding while quilting. I got this ruler from Judi at Green Fairy Quilts. If you haven't bought one yet, I would recommend it as your next buy. Its also small enough and with the handle that I haven't added grip tape to the bottom yet, because it really doesn't slip. I did all of by straight lines on this quilt with this ruler, and because of the 1/4" lines I did very little marking.
The Deloa's Boomerang ruler came at a recommendation of Linda from The Quilted Pineapple. It can be purchased at deloasquiltshop.com. I have the 20" finished boomerang, and this is the ruler I used to do all of the slight curves.
The circle ruler I have added some skate board grip tape to the bottom to prevent slipping while quilting, its genius! I got this circle and several other sizes of circles, and even a long 18" straight ruler, from deepbluetemplates.com. Love these!
Thanks for stopping by, hope you are enjoying your summer!
Happy sewing~!
~ leisha