Friday, May 30, 2014

Morocco

Meet the newest of Patricia Ritter and my pantograph designs, "Morocco"!
So excited for this one to arrive and give it a try myself.
Morocco was inspired by some of the quilting I've been doing in blocks lately,
and Patricia nailed my vision when she was digitizing it.
It would add lovely flair to your quilt, and look forward to seeing how it looks on several quilts.
 
Morocco, like all of our other pantograph designs comes in both paper and digital format on the Urban Elementz website.
 
I've added it to the sidebar on the right, if you click on the picture it will take you right there.
We are going to take a little break, with summer here, releasing any new designs.
 
Eventually I will add a link in the sidebar, of our pantograph design section, with a slideshow of the pictures of the pantographs.  Until then enjoy all of those lovely pictures.
 
Thanks for the support many of you have given Patricia and myself.  The quilting world is awesome. 
I'm looking forward to our next designs coming out later this summer. 
 
until then, happy sewing!
~leisha

Wednesday, May 21, 2014

Quilt Prep Intructions

After sharing the other post about "10 things your longarm quilter wants you to know"; I thought it would be best for me to share, with those of you who I quilt for,
the quilt prep steps that help me when machine quilting your quilts.
These steps save me oodles of time, which keeps your cost of quilting down.
Please take the time to review these.  Thank you!

These quilt prep tips have been added to the Quilt Prep tab on the top right of
my blog, for your convenience and future reference.
~
Please do the following before bringing or sending your quilts to be machine quilted.
Make sure your batting and quilt backing are at least 4" bigger than your quilt top on ALL sides.


Please make sure your quilt back and quilt front are squared up (no extra fabric hanging off any end) and cut exactly straight.  Otherwise it is difficult to have the quilt lay flat and be tight on the quilting frames.

Please iron your quilt front and back well.  It helps prevent puckers and pleats while I’m quilting. 

Leave the selvage on the top and bottom of your quilt back, this helps the top and bottom edge to be straight, which is a must!


Trim all threads on your quilt, the top of the quilt and the back where all of your seams are.   


Borders have a habit of growing when they are on the machine.  To prevent that, measure your quilt and cut your borders to size.  Then pin the borders on, starting at each end, then the middle, then several places between.  This is especially important on multiple large borders.


The quilt top should be free of button, beads, etc. for best quilting results.  The quilt back should be free of ribbons, buttons, beads or wool applique. 

Bring your quilt front and back separated, nicely folded or on a hanger.  Quilt front and backs that are folded up together or brought in a sack get wrinkled easily.   

Don't pin or baste your quilt layers together.  Each layer will be pinned to the machine individually.   


When piecing Minky, make sure you have the stretches going the same way, otherwise I will not quilt it.  It is also important to cut the minky straight, especially before piecing.  Check out this video I made for more tips on Minky: https://www.youtube.com/watch?v=g2SDbAcL56g 

Sheets are not considered suitable backing for quilts, because of the high thread count. 

Quilting jeans:  I've decided that I will not be quilting jean quilts.  The thickness of the jeans is tough on our machine.  Sorry for the inconvenience.

ŸIf you need a quilt quilted by a certain date please call ahead of time and let me know.  If you desire to be added to my list, I require the quilt to be to me within 2 weeks of the deadline, or a rush fee will be charged.  I will try my best to help you, however I quilt on a first come first serve basis.  Rush fees are between $25 to $65, depending on the size, quilting design, and size of your quilt.        
To get pricing about quilting and sewing please contact me at: Quiltingit@gmail.com

"10 things your longarm quilter wants you to know"!

I was lucky enough to be asked by Sarah from Crinkle Love, to join with her, Natalia Bonner from Piece N Quilt, and Christina Lane from Sometimes Crafter to share some tips on preparing your quilt for your longarm quilter to quilt.  Please click on the link below to read all about it!  Thanks, Sarah! 


Saturday, May 17, 2014

International Quilt Market quilting~!

It's so fun to quilt for pattern designers who release their patterns at quilt market.
For this market I was able to quilt 3 quilts!
 
I first met Marcea Owen from Abbey Lane Quilts a couple of years ago when she was dressed up as Marsha, for My Girlfriend's Quilt Shoppe shop hop...the theme was TV shows from the past and they chose the Brady Bunch.  Anyway, she told me she'd call me sometime and have me quilt for them.
I was beyond thrilled when she called this spring telling me she had 2 block of the week quilts that she needed quilted for market.  Its an honor to quilt for a pattern designer and see my quilting on their pattern covers and the pictures inside the pattern, its an even bigger honor to have it taken to International Quilt Market, which is happening now in Pittsburg. 
Marcea was great to work with and I look forward to future things we'll work on together. 
Here is a picture that Marcea Texted me a couple of nights ago,
of their display of the two Lil' Munchkin's quilts, from their booth #1150 at Quilt Market. 
Below are some close ups of the quilting.  Enjoy~!
There will be kits available, when the patterns are available soon, at Sisters and Quilters.
 Don't you just love this!!  Marcea designed this as a block of the week, and used fabrics in her stash...which is perfect, we all have a fabric stash...right?!?! 
 I love all the grey mixed in with the Halloween colors.  Makes it the perfect fall wall hanging.
 The first thing we talked about when it came to the quilting was the background behind the pumpkin couple.  I suggested a crackle, but a much smaller one...Marcea loved the idea of the crackle, but she wanted it huge, like 2"-3" big.  Which I loved!  It was so fun to make it jumbo size.  I normally freehand the crackle, because its not very big.  But this time I wanted it to be more precise, with it being so big, so I used a straight longarm quilting ruler.  It quilted like a breeze! 
 Don't you just love those pumpkin munchkins!  I do!
We wanted every little part of the wall hanging to be enhanced and we both think it did just that!
Marcea loves to wash her quilts before taking them to market, and she stopped by to show me the fun crinkled look that the 8020 batting I used gave the quilt.  I loved the added character it gave it!
 For this wall hanging I used 9 different colors of thread, and it took me 6 hours to quilt. 
Thread colors: 2 oranges, 2 greens, 2 greys, a white, a black, and a cream.
I love to quilt lines in backgrounds or inside shapes that add
texture and depth to the quilt, like is shown here.
 I love these bats as much as I love the pumpkin munchkin's.  I wanted to accentuate the points and lines, but knew I needed to add more depth to it, which is what the second line under the wing does.  Having them all lined up creates a cool effect! 
 another view!
 We decided to repeat the lines from the bottom, behind the triangles,
to the top behind the on point squares where the webs are quilted.
To keep it fresh and modern.
 He is just so handsome!
I quilted lines in his hat, face, jacket, and pants.
 She's adorable!
Her pointy hat was the perfect thing to echo and create a triangle texture.
Her face also got lines, but in her dress I quilted some jumbo pebbles.
I love the effect that lines can have on something...like these stars!  Also you should notice the border, its quilted in squares and I love how simple yet complete it made this quilt.
 
The second munchkin block of the week!
 So bright and fun, huh?!?!
The dark teal color added with the miny blue and red is my most favorite part of this.
If I remember right I used 5 colors of thread on this one: white, cream, minty blue, dark teal, and red.
This is also one that is intended to be make using fabrics that you have in your stash.
 The lines I quilted in the sections on the candy body made the snowmunckin POP!
 Another view!
 Here is a view of the snowflakes on the bottom.
We wanted the lines and stippling to help the snowflakes pop, like shown above and below.
 Aren't those fabrics and colors so fun!
 With the pinwheels we wanted something simple that would show off the shape of the triangles.
Like pictured above and below.
 Another View.
 I quilting around every part of the snowmunchkin, because we decided on quilting some star like snowflakes in the background, similar to the ones in his eyes.
 Some lines flowing out from the points of each tree section, play off the crooked trees.
A last close up.
You can see the checker border, super mini inner border and the outside teal border in this picture.
Fun textures for sure in this quilt!
 
  The week before quilt market I was able to quilt this amazing quilt by
Kimberly Bourne from Mainstreet Market Designs!
Kimberly is wonderful!  She wasn't quite sure what she wanted exactly...just something modern.
This pattern she designed is called, "Richelle" and is almost available. 
 The fabric is by "The Quilted Fish", and will be available at Riley Blake.
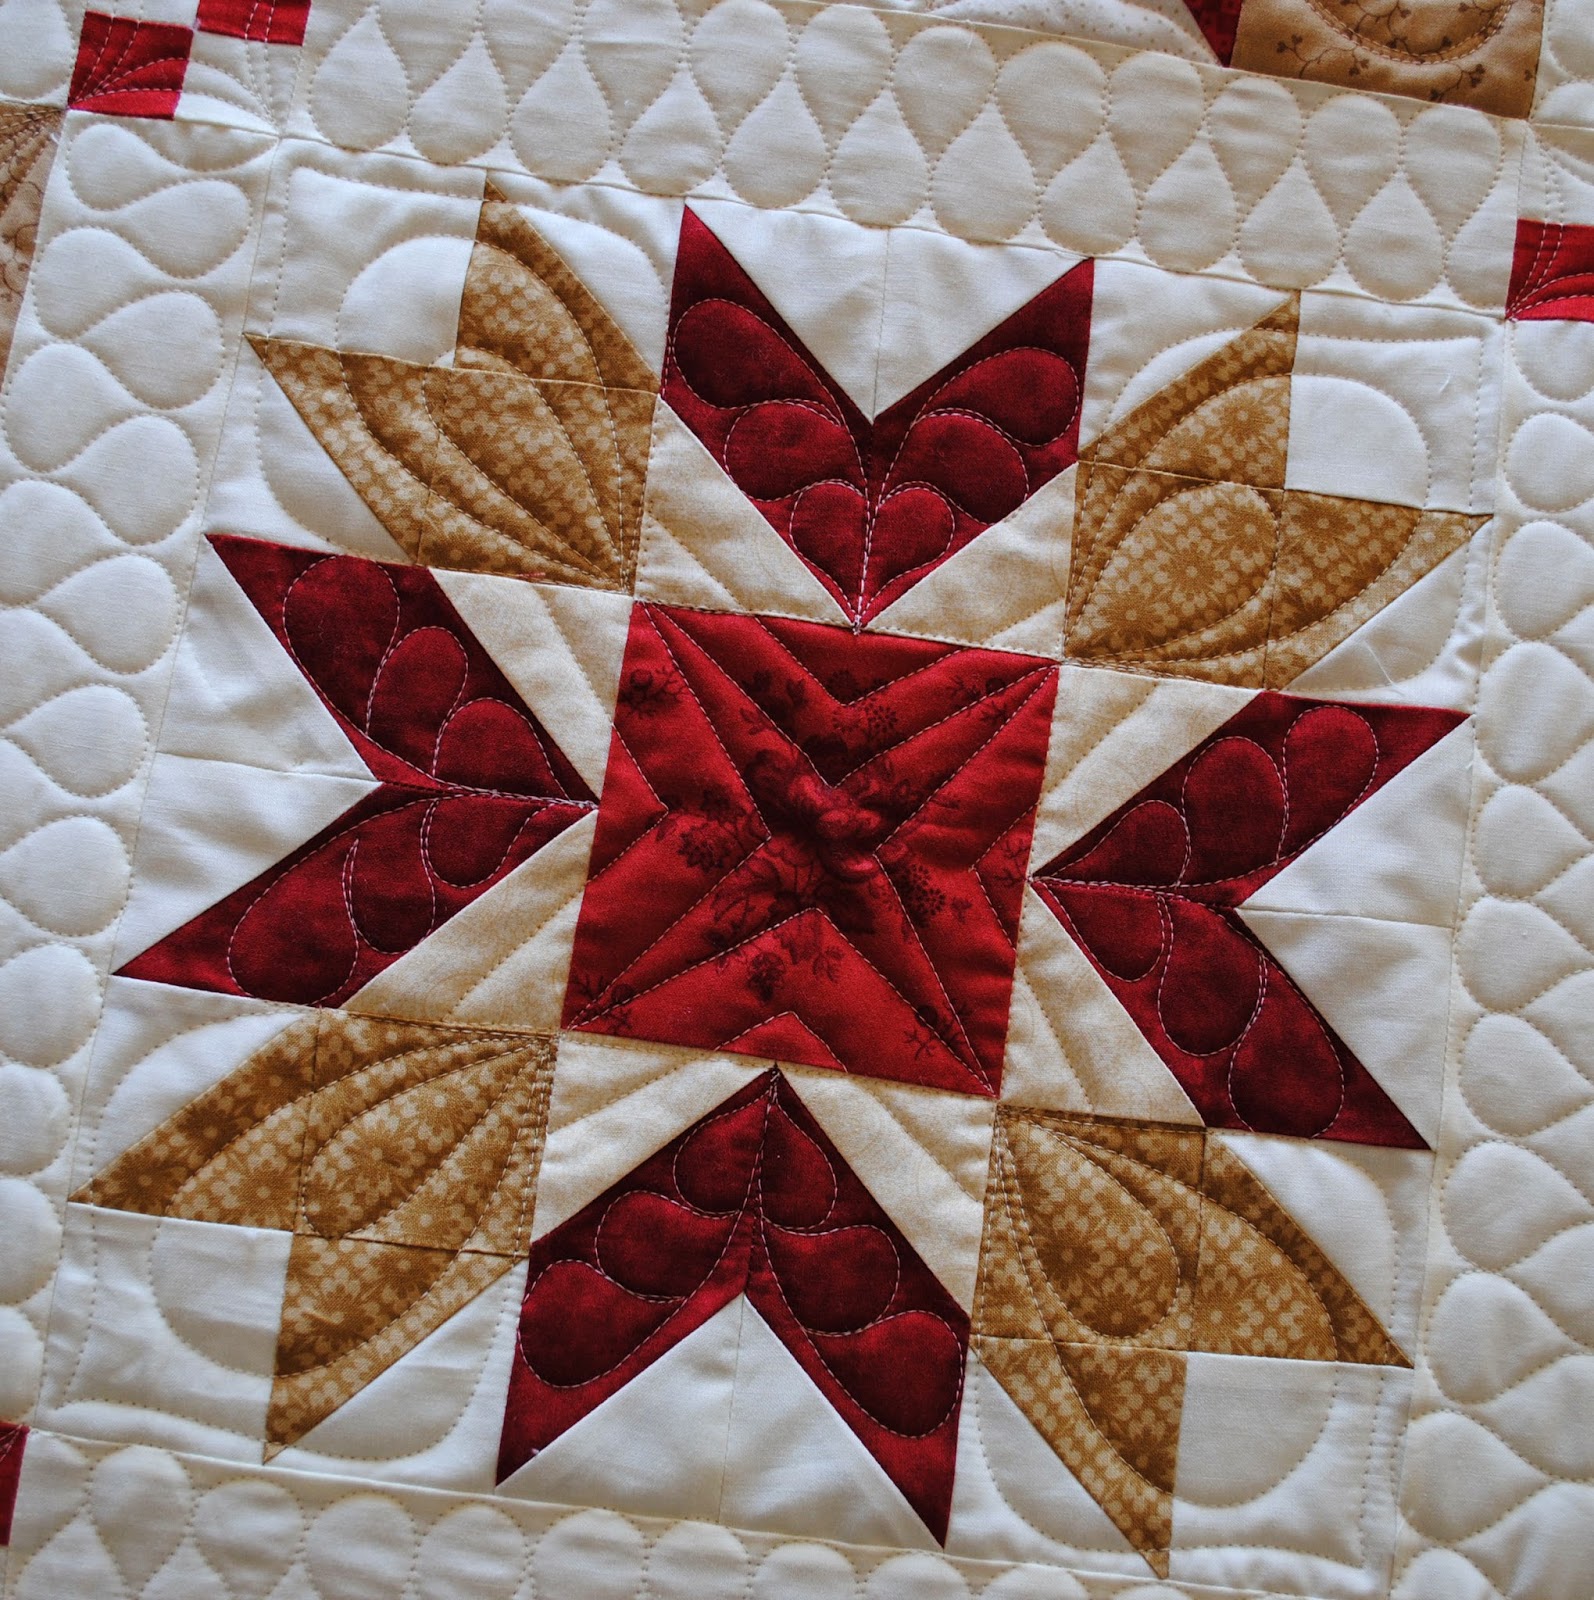
Don't you just love that flower!
Kimberly fussy cut each flower center piece for the orange flower and the white flower.
 This quilt is so cool, all the angles and how they interlock together...amazing!
 Look at those on point triangle blocks...I've been wanting to do a design like that for awhile, but just didn't have the right quilt to do it on.  The fan look enhances all of the other lines that were quilted in the center of the quilt.  Also, don't you just LOVE the colors in this fabric line, I do.
 a top view!
 angled view!
  I wanted to keep it super simple and so I didn't quilt in the flower centers, just lines around the outside of both blocks...which made the flowers POP!!
This quilt is hanging in the Quilted Fish section of the Riley Blake booth at Market.
I saw it on instagram, go to their page and check it out!
 
Thanks so much for reading, and I look forward to quilting for the next Quilt Market in the fall!
 
~leisha

Thursday, May 15, 2014

Denise's Bloom Quilt

Denise made this very sweet "Bloom" quilt,
for her daughter's birthday this spring.  Lucky girl!! 
When Denise messaged me to get on my quilting list back in February and shared a picture with me of this pattern, I was super excited for it to come and to quilt it.  I have been so inspired by the white backgrounds on other quilts I've seen machine quilters quilting, and so I was thrilled to quilt a quilt with so much negative/open space.  When she brought it and I saw the hours of work she pour into needle turning each petal, I knew I needed to enhance this quilt somehow to make those flowers pop and yet I wanted them to seem like they are floating.  You know when you see a flower floating in a pond or fountain, that's what this quilt reminds me of, love it! 
  I posted a picture of this quilt on Instagram, while it was on the quilting machine after I had just started quilting it and Vanessa from "V and Co." saw it and was, like me, gushing over the three ombre borders.  She shared a picture with her followers the next day when I had it finished.  Thanks, Vanessa! 
Its quite a compliment when the fabric and pattern designer love and compliment your work.
 
The pattern only calls for one border, but Denise needed to make it bigger to fit her daughters bed, perfect choice to add the three!  With the ombre fabric the color pink goes from an intense pink color to a faded lighter pink, and then back to the intense pink.  If you look at the pictures closely you can see that Denise didn't line up the ombre's, which I love!  It adds to effect of the 3 borders.  Each flower on this quilt is actually made using a ombre jelly roll designed by Vanessa.  So the petals of the flowers differ in hue and shade.  I wish you could all see this in person.  If Denise decides to enter it into the county fair this summer, hopefully those of you in Cache Valley Utah will get to see it.   
I used a white 30 tex Perma Core A&E thread, and a 8020 cotton/poly batting.
 
 love these dancing flowers!
 To make it fun for Denise's daughter I wanted to add lots of swirls, then the pebbles and occasional one petal feathers made there way in as well.  This quilting was completely free hand and so so fun to do.  I knew I wanted to add the back and forth figure 8 in the outside border, but I just stewed and stewed over what to do with the pink borders and the two white mini borders inside the pink ones.  So, I went with leaving the pink unquilted and doing a circle chain in the white borders.  It made the borders POP, just like the flowers.  With everything else being quilted so dense, those pink borders needed to be left alone.  And, I couldn't be more thrilled with the result.
  Love how the light picks up the texture in this picture.  LOVE it!
 Another view of those awesome borders!
 Its so fun for me to look back at quilts like these and be thrilled with how they turn out, and to think...WOW, I quilted that.  I've defiantly been blessed with a talent by our most loving Heavenly Father to get to do something I LOVE almost everyday, and to have the clients I have who let me "work my magic"!  Thanks so much Denise!
 
Happy sewing to you~!
- leisha 
 

LaReen's Gorgeous Quilt!

There are just some quilts that need their own post!
 
LaReen's gorgeous red, gold, and cream quilt is one of them.
She made this quilt for her wonderful lucky daughter Jackie who just got married this past weekend.  LaReen, a dear friend of mine, spent months piecing the blocks and even designed a few of them herself.  Actually one of my most favorite blocks she made was a mess up block.  Love it!  Happy accidents like that in quilting are just awesome.  She used quite a bit of the fabrics from the Midwinter Reds line by Minick & Simpson at Moda.  Its such a gorgeous quilt and LaReen did a beautiful job, as always!
 There are 18 different blocks, and she made two of each one.  I used a cream Perma Core
A&E 30 tex thread on the inside of the quilt, and a Deep Cardinal red thread for the border. 
I used a 8020 cotton/poly batting.
 There are more pictures posted on Facebook of this quilt.  Just scroll down to April 12 or try and click on this link: LaReen!
 
When LaReen and I usually talk about the quilt for her quilts we think about each part and what will work best.  With this one though we didn't have much time.  So we just talked about the kind of style that she would like, some traditional quilting and whatever else I thought would look good.  I was super excited to see how this was going to turn out, because I made a quilt similar to this one using the "Apple Pie in the Sky" quilt along that my aunt Kristin from Sisters and Quilters did last year.  The instructions to the quilt along start here: Sisters and Quilters Blog and ran for several weeks.  Kristin taught several techniques while piecing to save on time and fabric waste.  A few of the following blocks are not from the quilt along, because like me, LaReen wanted to make her quilt bigger.  However, we used a lot of the dimensions for the blocks that Kristin used in her tutorials.  For instance if there was a block I wanted to make using 4 squares across, I went to a block that Kristin made using 4 squares and I used the same dimensions she did...worked perfect every time.  Same for 1/2 square triangles or flying geese.  I know LaReen did the same thing.  Here are the following 18 different block designs that she had in her quilt. 
This is not one of the "Apple Pie in the Sky" blocks, but could easily be figured out by going to the block designs that had three squares across, with some of them being half square triangles.  When figuring out the machine quilting designs for this quilt, I knew I wanted to add some lines to add to the detailed look of the quilt, without over quilting it.
Love the fun bow tie look to this block.  LaReen thought the quilting
made it look like a wrapped candy.  :) 
 This is my most favorite block to quilt!  It was also the block that was the happy accident.  I told LaReen, I want to make a quilt with this block.  The quilting on this one started with the inside lines, then the outside...then those loops just happened, which makes the block pop! 
This block just makes me happy!
 If you look closely at the four patches you can see the four pointed stars quilted in them. 
Which made a fun chained diagonal look.
 This is one of the "Apple Pie in the Sky" blocks.  Great technique taught on this one for flying geese.  Adding the lines in the center makes the red pinwheel have movement and the feather motif's add a needed softness to all those points.  Its also fun when I can add something hidden in the background to add dimension, the 3 petal feather does just that.
 This is also an "Apple Pie in the Sky" block.  Super fun one to make.  Love how the quilting on this one starts straight and goes to the soft and pretty curves of the feathers and petal designs.
 This is also a "Apple Pie in the Sky" block with a twist on the four outside corners, love it!!  Once again the lines enhance the quilt block while the feathers soften up the center and create movement in the star diamonds.  The loop design on the gold inset triangles add interest and depth to the block. 
 Sometimes quilts need simple blocks like these to add depth.  I kept the quilting simple here, just enough to tie it to the other blocks in the quilt. 
 This is another "Apple Pie in the Sky" block.  Wish I had made one like this for my quilt.  I knew when I saw this quilt how I was going to quilt the basket.  I've seen a feathered handle and a striped basket on quilts from other quilters.  Then I just added the vines on the sides to not over shadow the quilt block.  Another of my favorite blocks.
 Another simple block that let me play with the points lines of the squares. 
Simple four patches are awesome for quilting lines and star designs.
 In keeping with the lines and stars that I've done in some of the other blocks I wanted to add the gorgeous simple star to the center of the star's 9 patch.  Finishing it off with some feather designs around and a arced swoop in the four corner blocks.
 This is yet another "Apple Pie in the Sky" block.  Love the movement that the quilting adds to this.  Feathers, petals, and swirls...perfect combo!
I've been seeing a lot of churn dash blocks lately, love that the corners on this one are dark like the inside rectangles.  The loops and feathers enhance the churn dash.    
 This was the very first block I quilted, and it was immediately one of my favorites, still is!  This is also an "Apple Pie in the Sky" block.  To find each block start by clicking on the link above and go from week to week to find your favorites. I love that center block line design, with the feathers and loops traveling around.  To top it off I quilted an orange peel arc in the background.  Also in this picture you can see the pack and forth figure 8 design in the sashing and the double arc in the medallion/corner stone blocks between the sashing. 
 This is also another "Apple Pie in the Sky" block.  Its fun for me to add curves and arcs with quilting the hard straight lines.  They are just a happy marriage.
 This "Apple Pie in the Sky" block may look tricky, but Kristin does an excellent job making it easy!  This one is fun with the large circles, instead of some feathers. 
Finished off with arcs in the corners and star in the center.
 This block sure turned out to be a fun one to quilt.  I'm going to have to remember it for the other star quilts I have in the future.  An inside echo with a loop inside makes it seem like a flower.  Love!
 This is the last of the 18 blocks...thanks for reading along.  Once again that simple star in the 9 patch with the double looped corner petals adds just the right amount of contrast to the feathered motif's on point.  Finishing it off with an arc in the background.
 The feathers and swirls on the border done it that Deep Cardinal Red A&E thread are stunning. 
One of my favorite machine quilting designs to add to any gorgeous quilt.
When I quilt a detailed quilt like this the first thing I want to do when I'm done, besides shout hallelujah, is to look at the back.  If you click on this picture with your computer mouse it should enlarge and you can get a look at the awesome back.  Its especially great when the back fabric is light enough and doesn't have much pattern to the fabrics, like this one so you can see the quilting.
 
LaReen is such a dear friend of mine!  She would do anything for anyone, and is such an awesome example of going the extra mile for her friends.  Thanks for all you do, and for trusting me to just quilt away.  Love everything about this quilt!
 
Happy Quilting~!
- leisha